How to use Confluence for documentation: 6 steps to success
Share on socials
How to use Confluence for documentation: Six steps to success

Emma Smith
21st June, 2023

Emma Smith
21st June, 2023
Jump to section
jump to section
What is documentation - and why is it important?
Why should you use Confluence for documentation?
6 steps for successful Confluence documentation
Make your Confluence documentation user-friendly, clear, and interactive with our no-nonsense guide.
Confluence is an incredibly versatile tool with a number of different applications. Whether it’s used as a company wiki, department hub or co-working space to facilitate remote work, Confluence’s flexibility, accessibility and customisation potential make it a go-to choice for teams all over the world.
But what about external use cases? Confluence’s adaptability doesn’t stop at peer-to-peer collaboration within organisations. It can also be used to create technical documentation for external users of your products. Here’s why you should use Confluence for your documentation and how you can make it as clear, user-friendly and interactive as possible.
What is documentation - and why is it important?
The term “documentation” (also known as technical documentation) covers a wide range of information, usually organised into - surprise! - documents. Documentation comes in many forms and can be used for many different teams and purposes. Documentation should display and describe what a product is, how it works and how to use it properly. It should be constantly updated to reflect technological and software updates, and good documentation will be correct, consistent, complete, user-friendly, and easy to navigate.
Technical documentation plays an important role in the overall customer experience and can influence purchase decisions, renewal rates and customer satisfaction. This is only set to increase with the millennial customer coming of age. According to an SDL survey, 41% of millennials search for online tutorials, 33% search for technical documents and manuals, and 72% say that product information affects how they perceive a product. That makes it even more important to focus on your documentation now and into the future.
Why should you use Confluence for documentation?
Confluence is extremely collaborative. Couple this with the fact that it’s a web app and you’ve got a platform built for teamwork - no matter where colleagues are in the world. This allows technical writers, software developers and marketers to work in harmony for quicker, more accurate documentation creation.
Confluence’s simplicity makes it ideal for users of all experience levels to create documentation worthy of an external audience. Its intuitive interface and powerful editor makes it easy to create content, pages and spaces - and that’s before you start using Confluence macros. For organisations already familiar with and actively using the Atlassian suite, Confluence is a natural choice for documentation.
Using Confluence for documentation: 6 steps to success
Step 1: Create the framework
For organisations already using Confluence, this step should be easy. Simply create a new space (Spaces > Create space) and select Documentation space on the new screen.
You can then name your space, choose an icon, and set permissions.
💡 Hint: If you’re not familiar with Confluence, check out Atlassian’s documentation on getting started in Confluence Cloud.
Step 2: Implement Confluence permissions to make content more (and less) accessible
When you’re creating new pages, you’ll likely want to develop them over time, often with the input of other team members and stakeholders. When pages are in draft state, half-finished or littered with comments, it’s best practice to keep them hidden not only from your external users but also from internal team members who don’t need to input on them.
With that in mind, you should restrict permissions as soon as you create a new page. This might mean keeping draft content exclusive to select team members or restricting a public page to staff members until it’s ready to be accessible to the public. When you share pages with reviewers for their feedback, make sure you change their restrictions accordingly.
💡 Hint: In-line and page comments can be extremely useful during the documentation drafting process. Just make sure to delete any comments before publishing your page.
⎯⎯
🔧 There's an app to help with that!
Make the documentation sign-off process easier with Comala Document Management. It’s a popular tool for adding workflows to Confluence, as well as adding review and approval processes to content publication.
Step 3: Make content more visually appealing
Just because it’s technical documentation, it doesn’t need to be dull or text-heavy. In fact, good documentation should feature plenty of images to help illustrate exactly what you’re telling users to do. Use up-to-date screenshots, gifs and video walk-throughs of your product in use, ideally with text to annotate the key features and steps.
As well as illustrating your product in action, you should keep your documentation visually appealing and eye-catching. This means using subheadings, bold text and colour appropriately. Many companies design their documentation to match their overall brand identity and their corporate website.
⎯⎯
🔧 There's an app to help with that!
Content Formatting Macros for Confluence allow you to customise your pages and content beyond the out-of-the-box Confluence functionality, giving you the power to increase engagement. You can add buttons to draw attention to the text you want users to interact with and design cards to display key information, among a range of other functions.
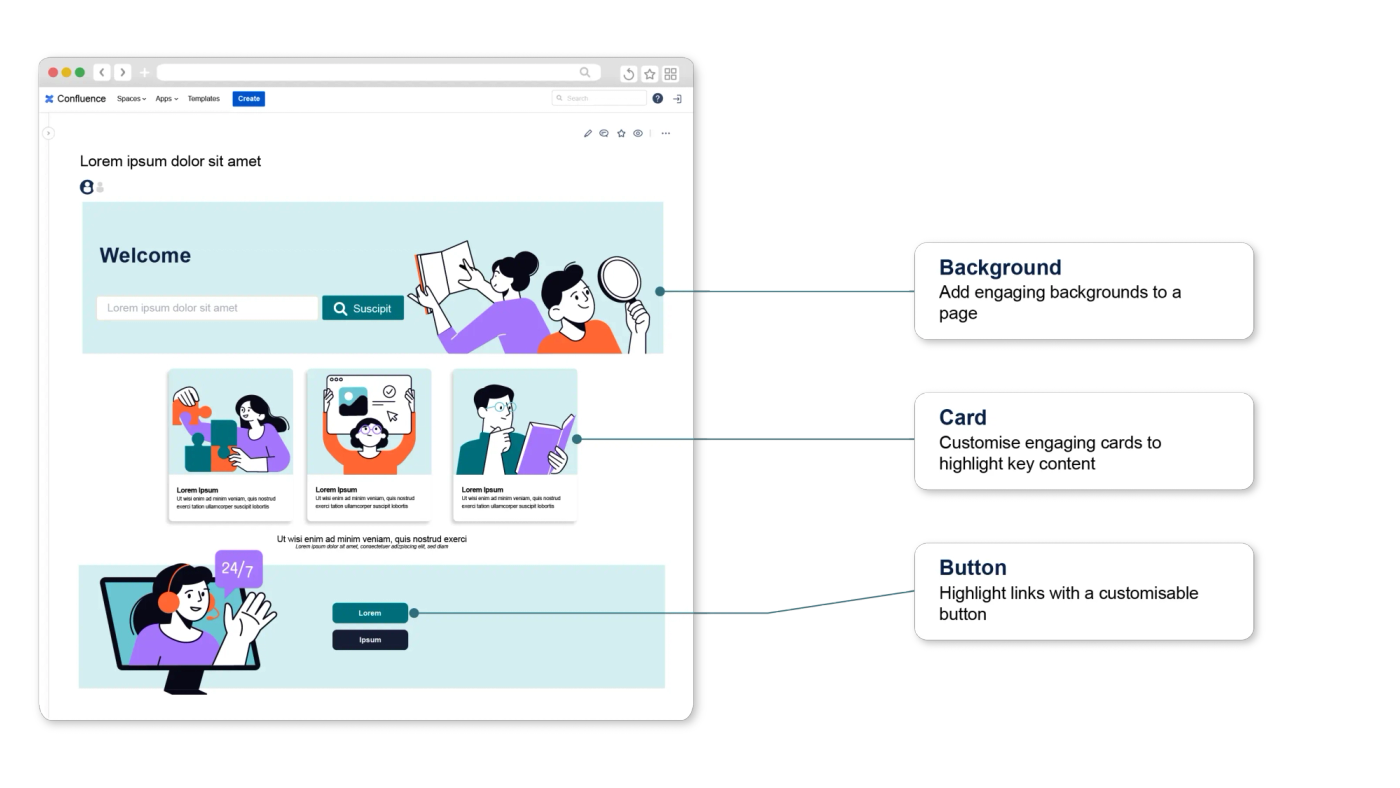
Content Formatting Macros for Confluence bring documentation to life.
Step 4: Focus on your organisation: Make your content clear and pages easily navigable
Part of making your pages pretty is keeping them clear of clutter and breaking up chunks of text into easily digestible sections.
Then there's the clutter in your overall space. Confluence spaces can spiral out of control if you're not careful, so have a structured page hierarchy and make sure there’s a clear pathway through your documentation. That means avoiding orphaned pages and making sure there are prominent links between relevant sections.
⎯⎯
🔧 There's an app to help with that!
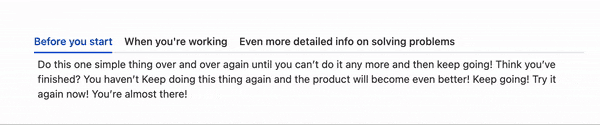
The Tabs Macro (part of Content Formatting Macros for Confluence) is tailor-made for sectioning off text, which keeps your pages clean and tidy. When you've got large chunks of information, use tabs to split your content into relevant sections. This lets your users digest it at their own pace.
The Footnotes and Tooltip macros, also part of Content Formatting Macros for Confluence, can also remove text clutter from the body of your documentation. They’re discreet ways of adding extra text to your page for your user to find if and when they need more information.
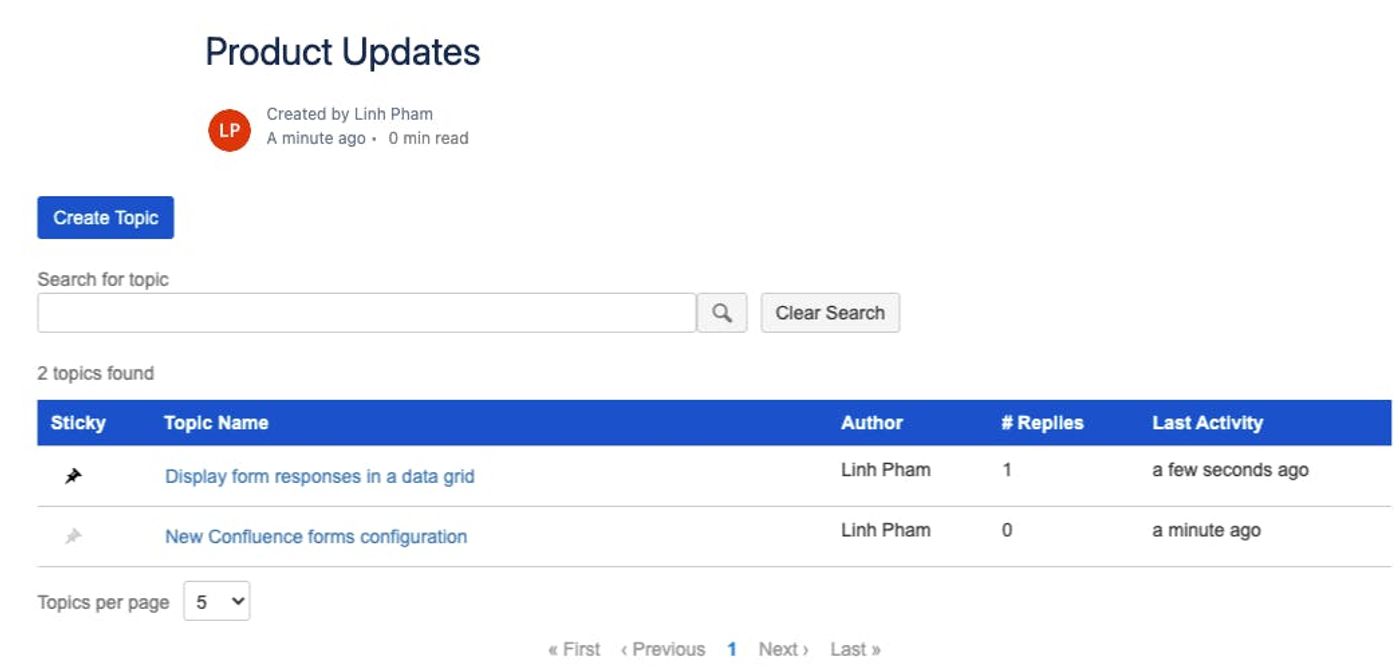
Once you’ve perfected your pages, it's time to focus on your Confluence site structure and navigation. Community Forums for Confluence can help. It allows you to organise pages into topics and subtopics, essentially creating a directory page of all existing pages. This means you can easily mark a page as a topic and remove outdated pages to help keep your documentation space clear and organised.
Step 5: Make your Confluence pages more interactive and seek out user feedback
Any UX designer knows that a good website is one that users want to interact and engage with, and your documentation should be no different.
As well as using buttons, tabs and links to encourage users to click through and explore, add more dedicated features to speak directly to your users and encourage them to share information with you. You’ll get the added benefit of not only making your website more interactive, but also encouraging valuable user feedback that can help make your documentation better than ever.
⎯⎯
🔧 There's an app to help with that!
Gather direct user feedback with Forms for Confluence. You can use Forms to run surveys, ask for specific feedback, or even ask users to submit requests or suggestions for new features.
Step 6: Get your Confluence documentation online
Time to take your space documentation public? You’ll need to use an add-on like Scroll Viewport to publish directly to the web, adding a customised web layer on top of the Confluence documentation. This means end users can view your Confluence documentation as a stylised website - without compromising your internal Confluence user interface.
And that’s it! You’re ready to share your brilliant documentation with your customers.
Related Content
Read more


Written by
Emma Smith
Emma is a Senior Content Marketing Manager for Kolekti.
Confluence
Knowledge Management
Content Formatting
Related Content
Read more