Upscaling content creation with Workflow Steps for Jira
Share on socials
Calling all content creators: say goodbye to task-switching and hello to creativity with Workflow Steps for Jira

Charlie Courtney
23rd June, 2023

Charlie Courtney
23rd June, 2023
Jump to section
Jump to section
Steps to install Workflow Steps for Jira
Steps to link your Jira instance with Slack
Steps to set up a workflow between Jira and Slack
Steps to add emoji reactions to your workflow
Take your content production to the next level
Learn how to take your content creation to the next level with Workflow Steps for Jira. Read the latest step-by-step guide from Upscale.
One of the biggest challenges businesses face today is creating content that attracts and engages the right customers. Whether it's an eBook, blog or social media post, the right content delivered in the right way can really help to set your brand apart from the competition. But success doesn't happen overnight. To make a real impact, you need to be able to produce high-quality and engaging content on a consistent basis.
Start with the right tools
For content creators, investing in the right tools can make or break their content workflow. So it's not surprising that a growing number are turning to Jira and Slack to keep their content machines running like clockwork.
There is, however, one not-so-little snag. Switching between Jira and Slack constantly will not only drive you crazy, but it will also slow down the whole process and, over time, grind your content production to a halt.
The good news is there's a way content creators can have their cake and eat it, i.e. get what they need out of Jira and Slack without endlessly switching between them.
Meet Workflow Steps for Jira, your key to connecting Jira and Slack.
Say goodbye to task-switching and hello to creativity
In this blog, we'll show you how you can use Workflow Steps for Jira to speed up your content creation process and eliminate the need to switch endlessly between Jira and Slack.
Ready?
Let's get started.
First up, make sure you've installed the app in your Slack workspace and have admin access to your Jira instance. Simple instructions are provided in the app to guide you through the process.
Ready?
Let's get started.
First up, make sure you've installed the app in your Slack workspace and have admin access to your Jira instance. Simple instructions are provided in the app to guide you through the process.
Steps to install Workflow Steps for Jira
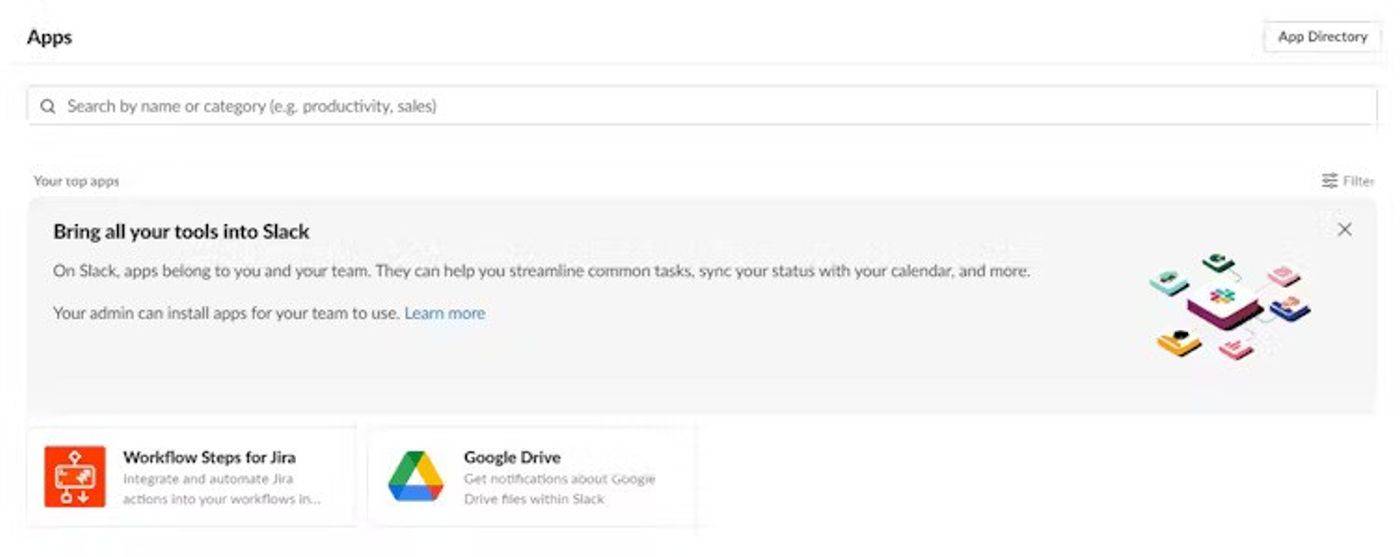
Select 'browse apps' by clicking on the + sign to the right of 'Apps' (bottom left of your Slack screen).
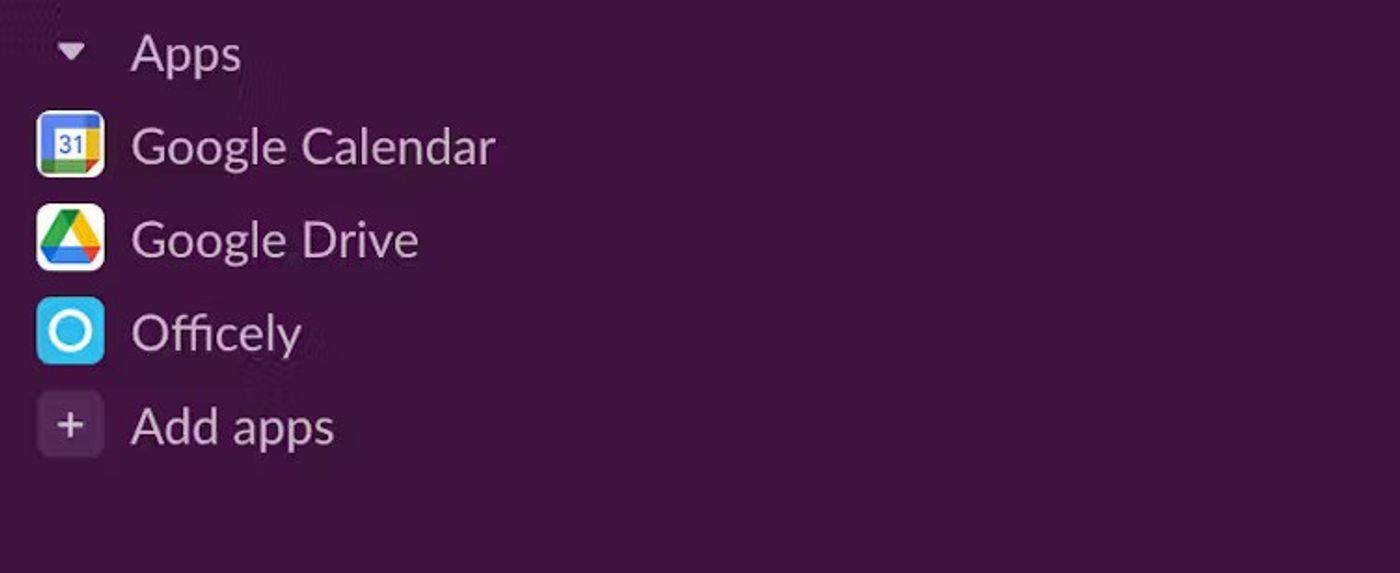
From there, you can select ‘Workflow Steps for Jira' if it's already on the list or search for it in the top bar.
Next, you will arrive at the Workflow Steps for Jira app home tab.
Steps to link your Jira instance with Slack
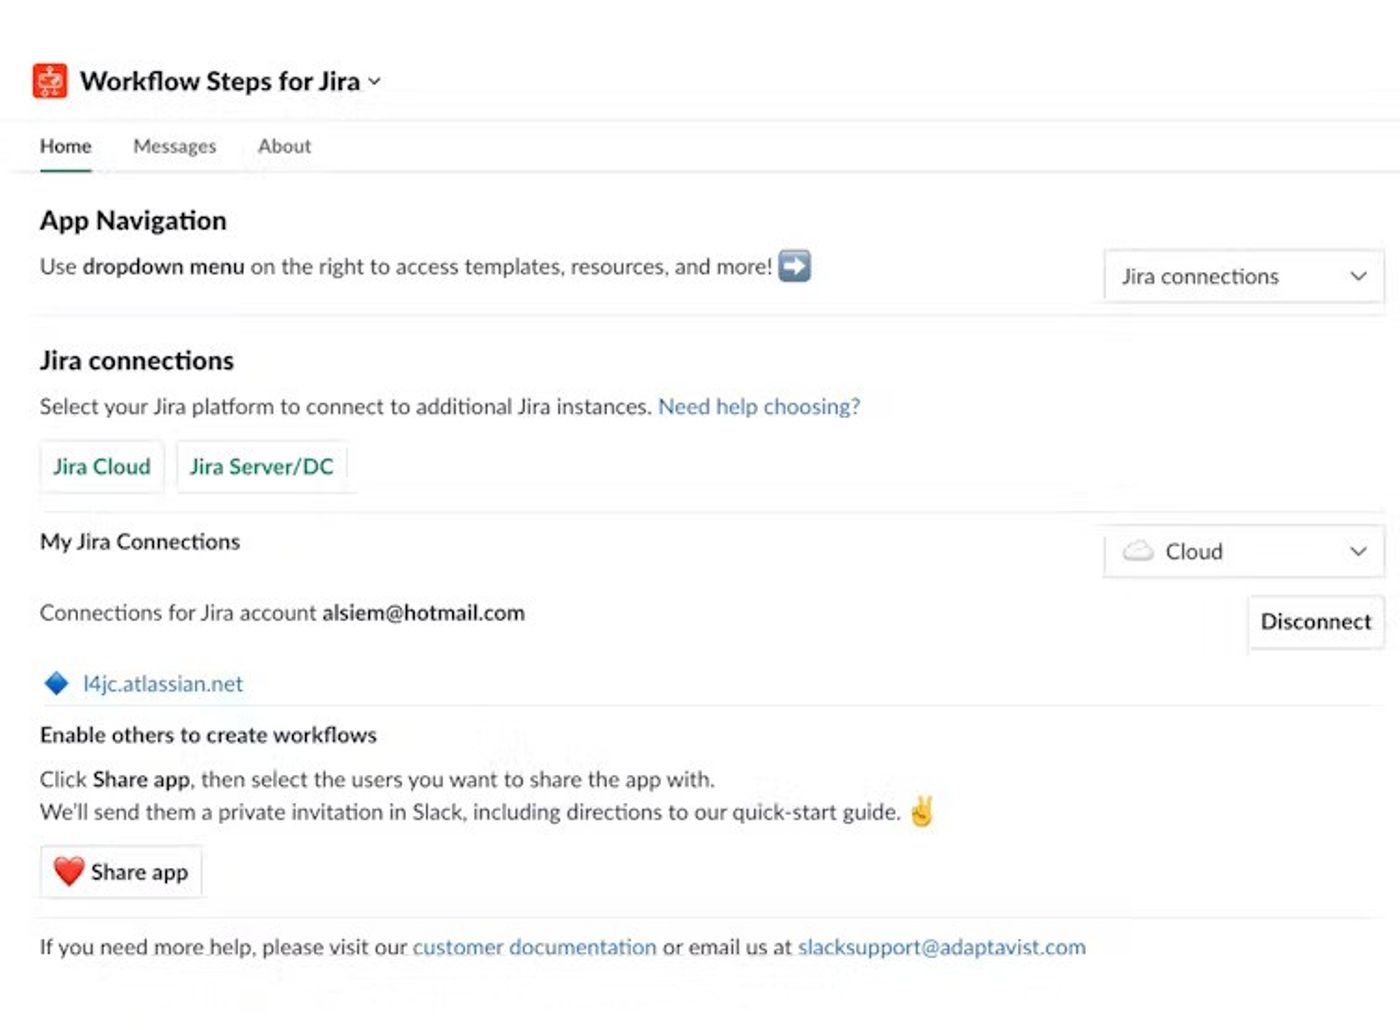
To connect Jira and Slack, you must choose the appropriate Jira platform and authenticate with your Jira instance, e.g. Jira Cloud or Jira Server/DC. Just click on the 'Need help choosing' link for help if you don't know which platform to use.
In this example, we've selected Cloud, and once you click the "Jira Cloud" button, a modal opens for authentication. Click 'authenticate'.
In this example, we've selected Cloud, and once you click the "Jira Cloud" button, a modal opens for authentication. Click 'authenticate'.
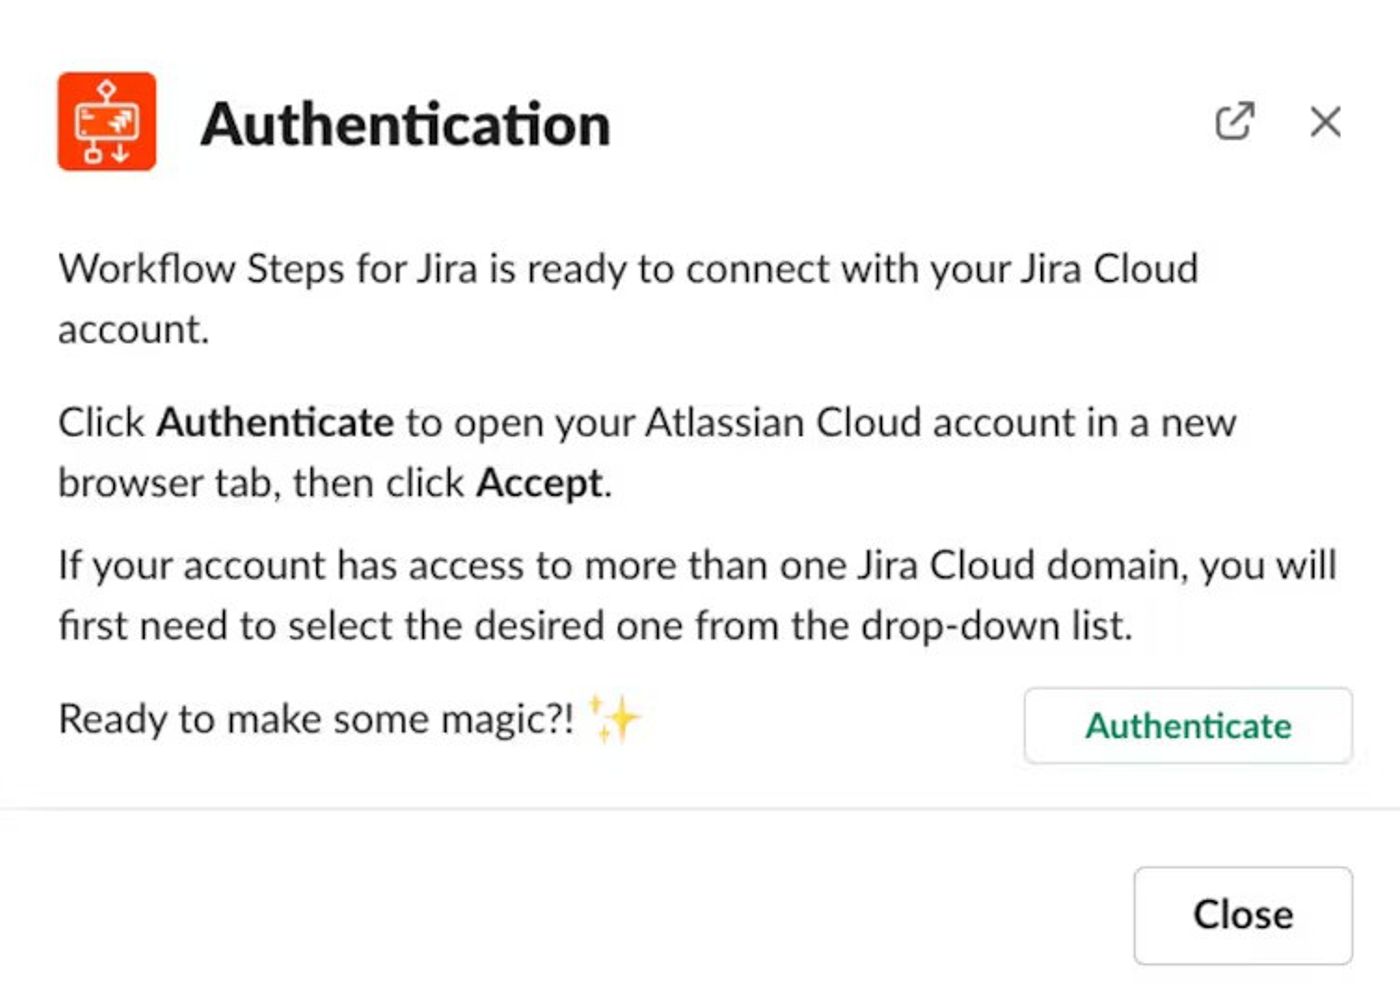
Next, your default browser will open, and you need to either log into your Atlassian account first or the following screen will open immediately.
Select accept to allow Workflow Steps for Jira access to your Atlassian account.
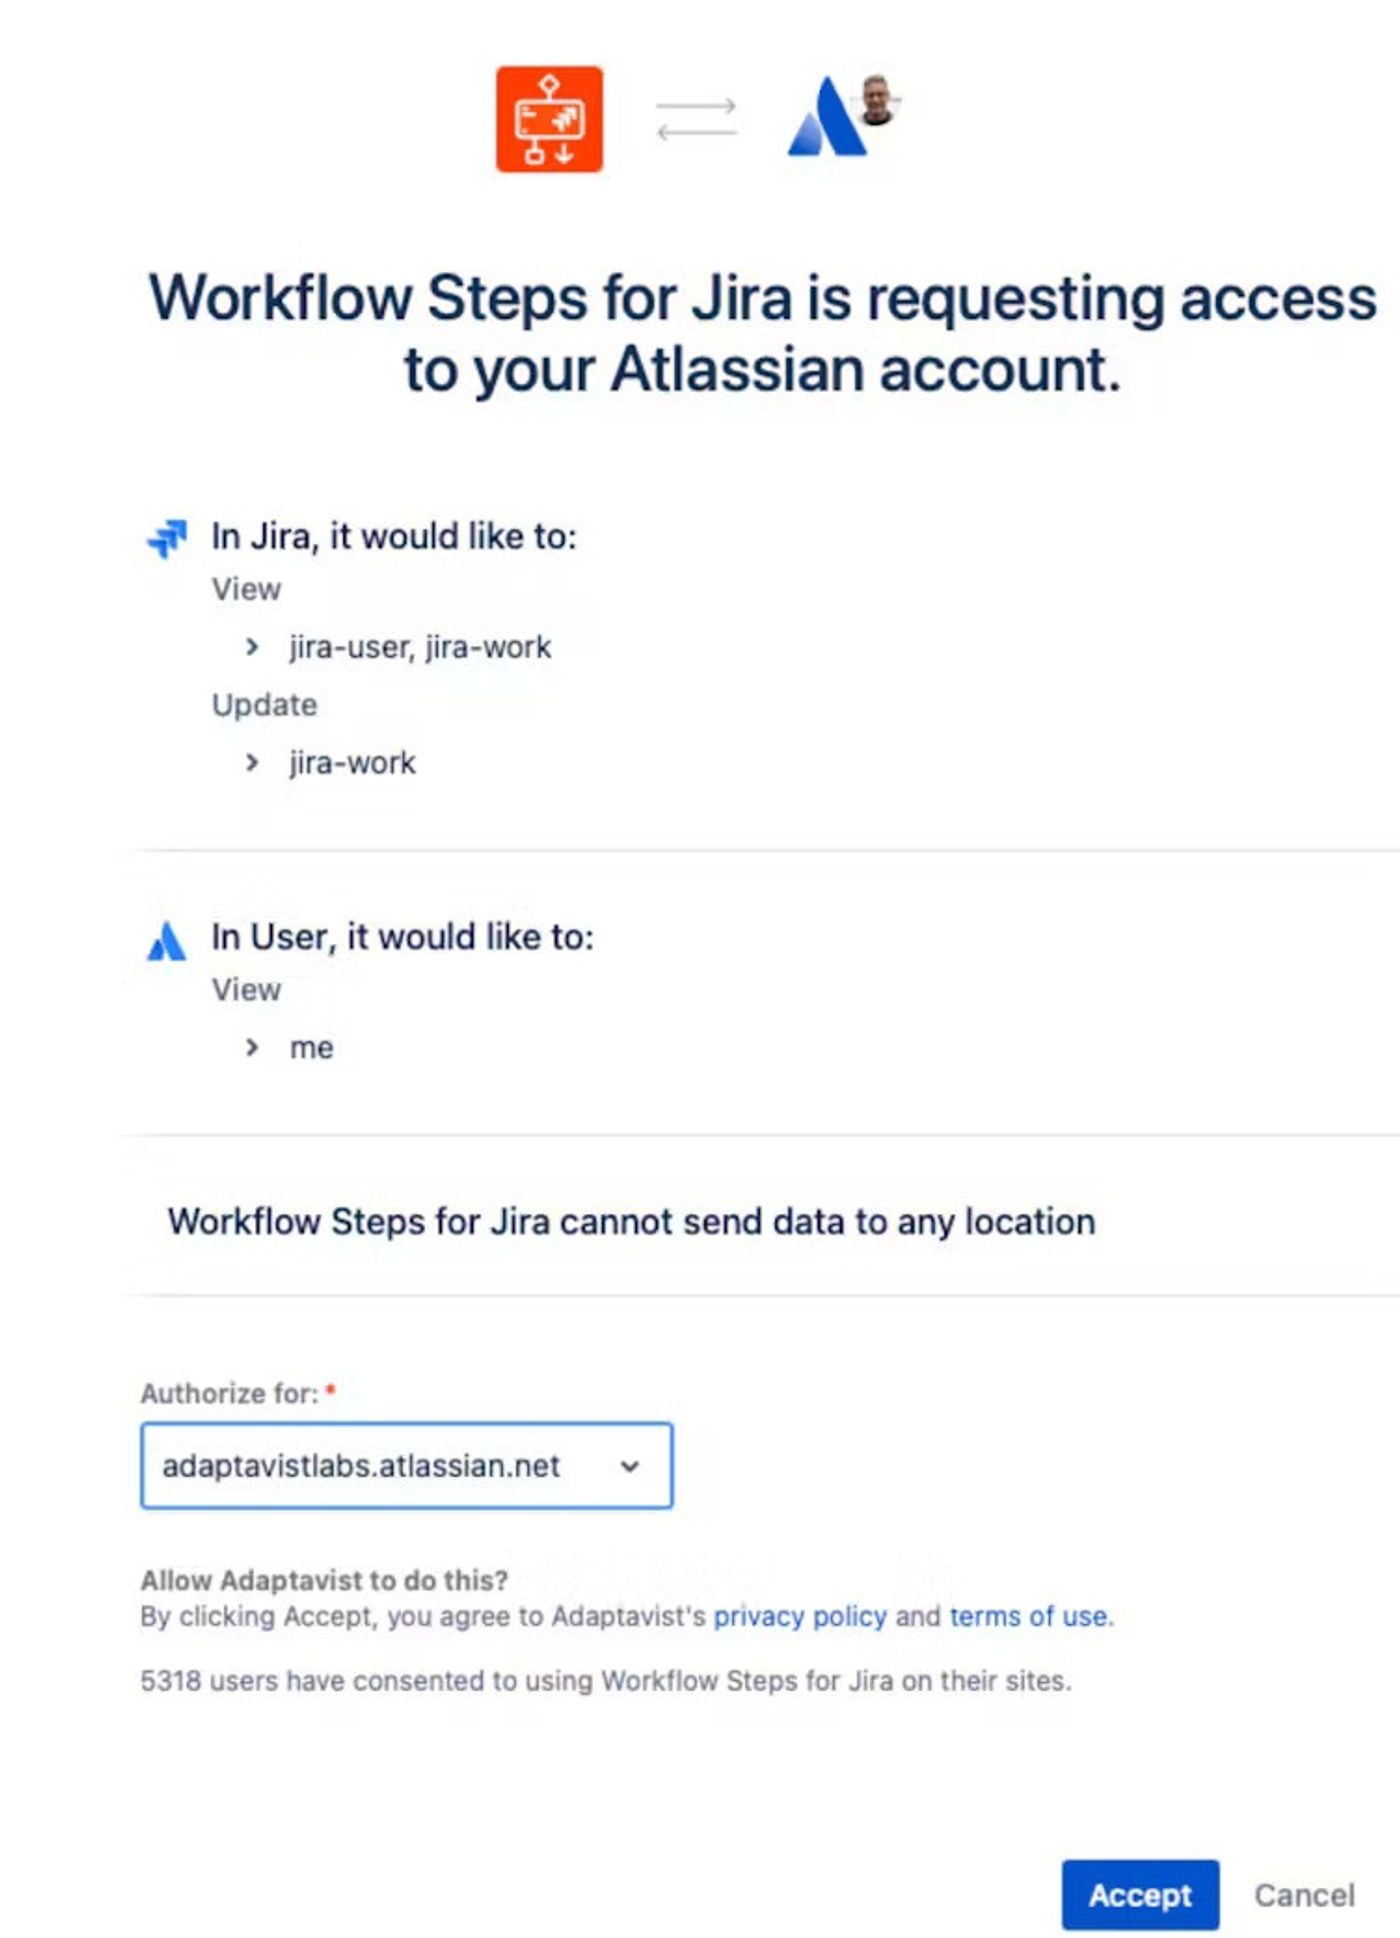
Once you see a success message, you can return to Slack to create your first workflow.

Steps to set up a workflow between Jira and Slack
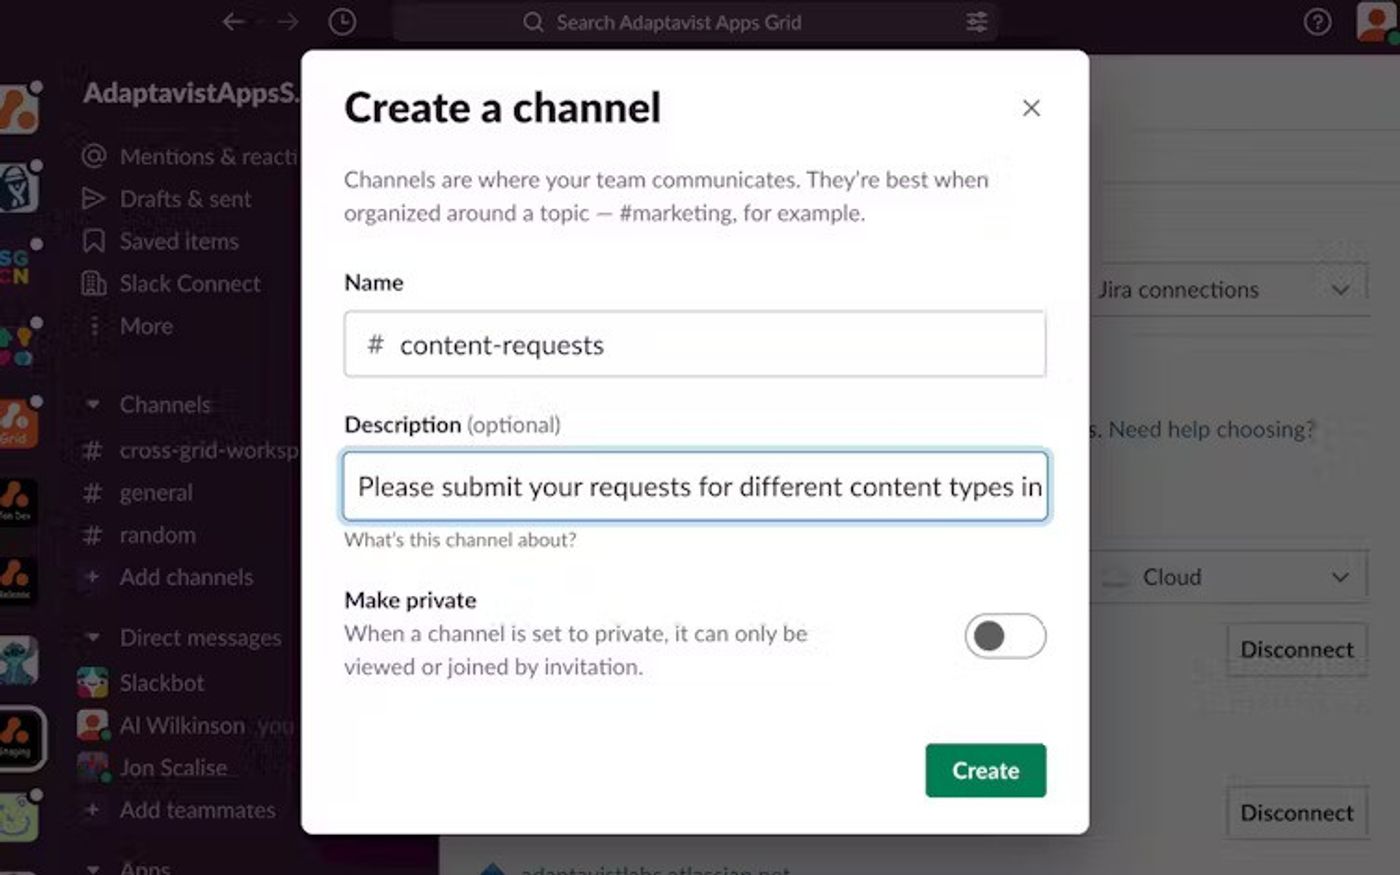
First, create a new channel you can use for all content requests. Click on the + sign to the left of the Channels button and select ‘create a channel.’
As an example, I have named the channel #content-requests, added a description (this is an optional field, but can be helpful to channel users), and clicked 'create.'
As an example, I have named the channel #content-requests, added a description (this is an optional field, but can be helpful to channel users), and clicked 'create.'
You can invite the people you want to the channel, as shown below. You can skip this step if you want to return to it later.

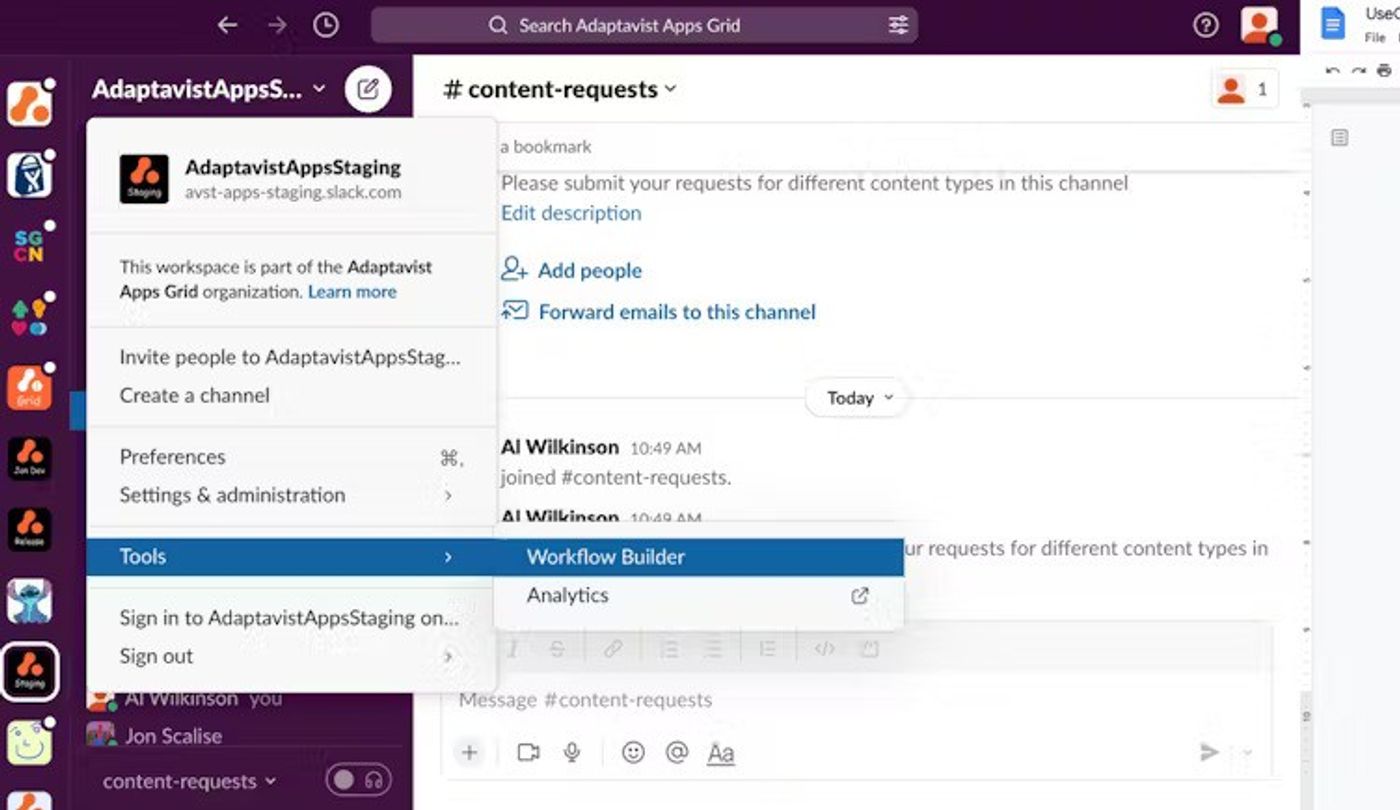
Now that your channel is ready, it's time for your content workflow.

Click the down arrow beside the name of your workspace (on the top left of your Slack screen) and select 'Tools' and 'Workflow builder'.
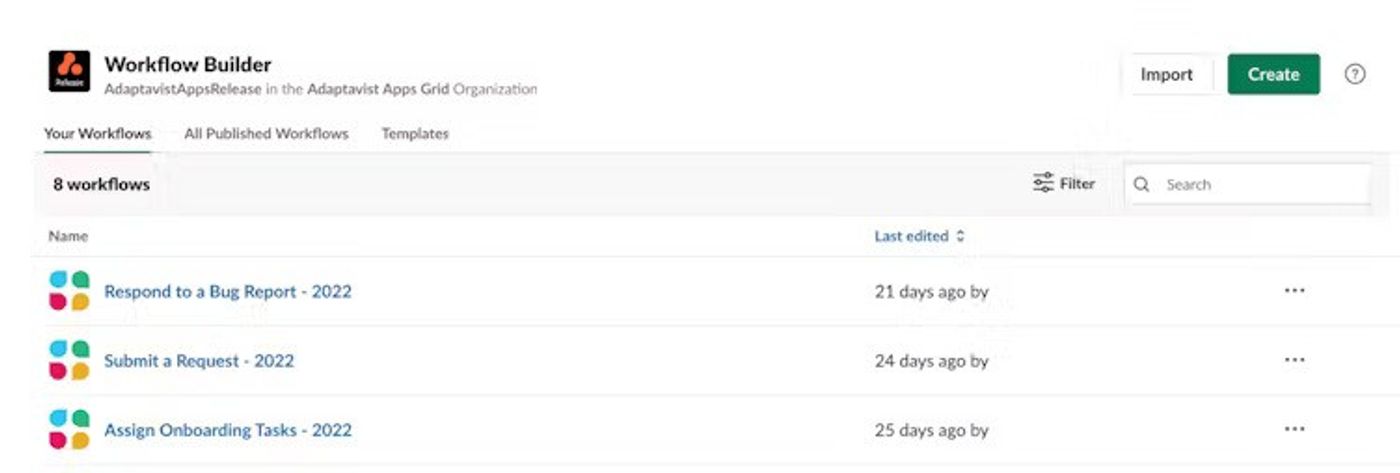
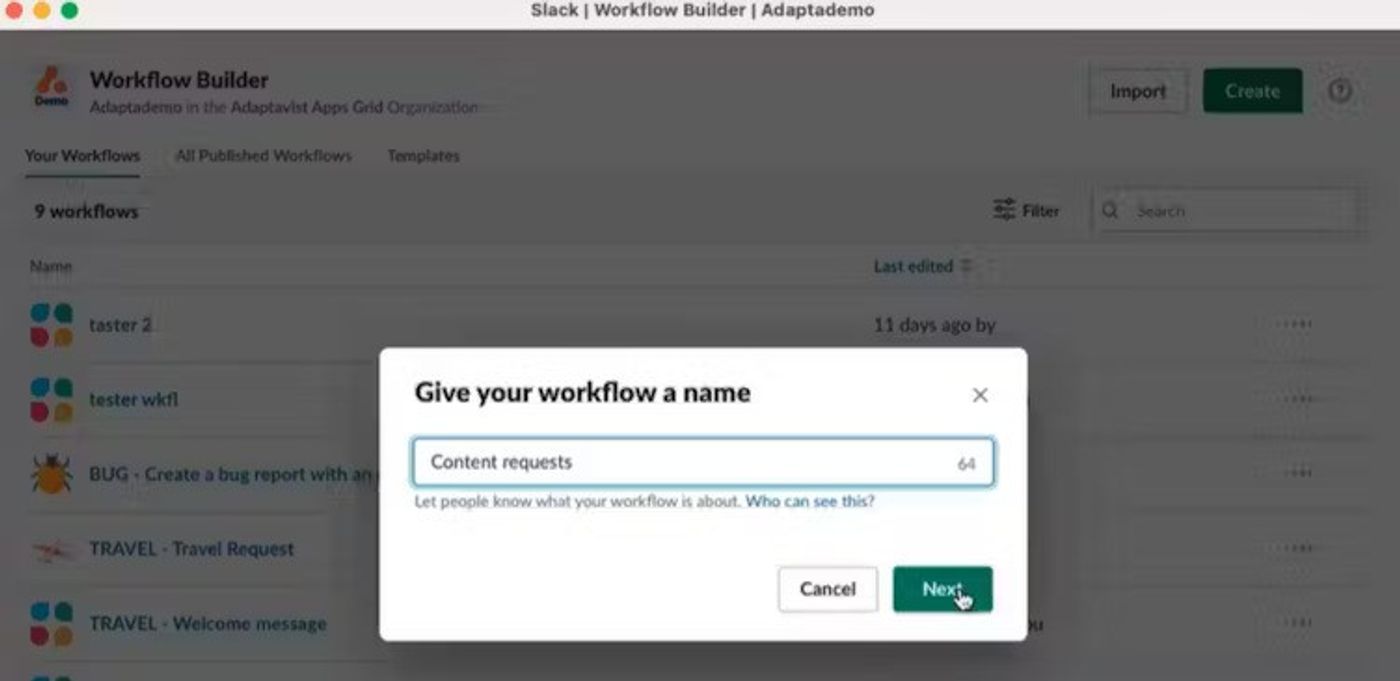
Select 'create' on the workflow builder page, then type in your workflow's name as shown below. Click 'next'.
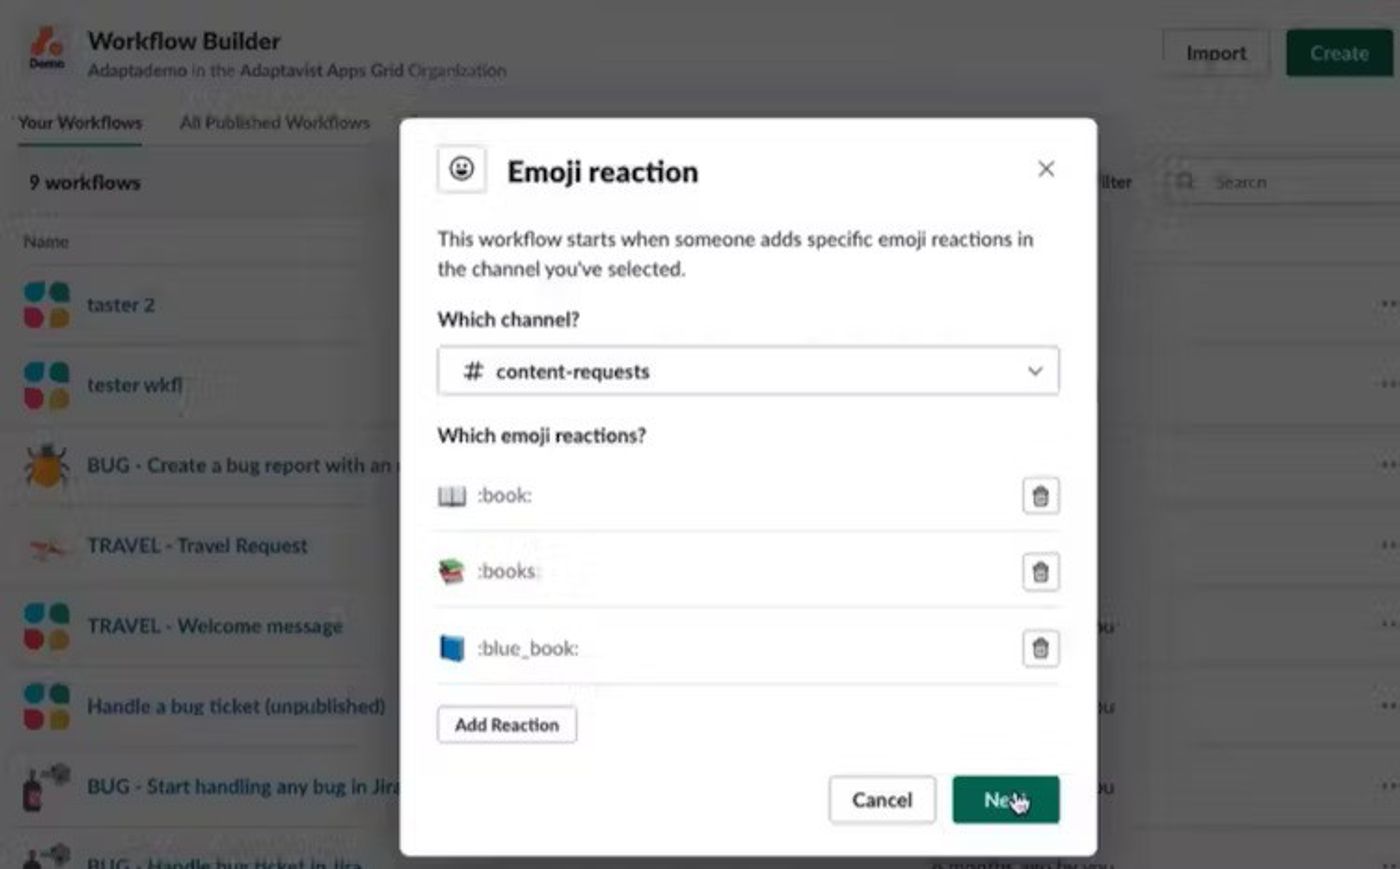
Steps to add emoji reactions to your workflow
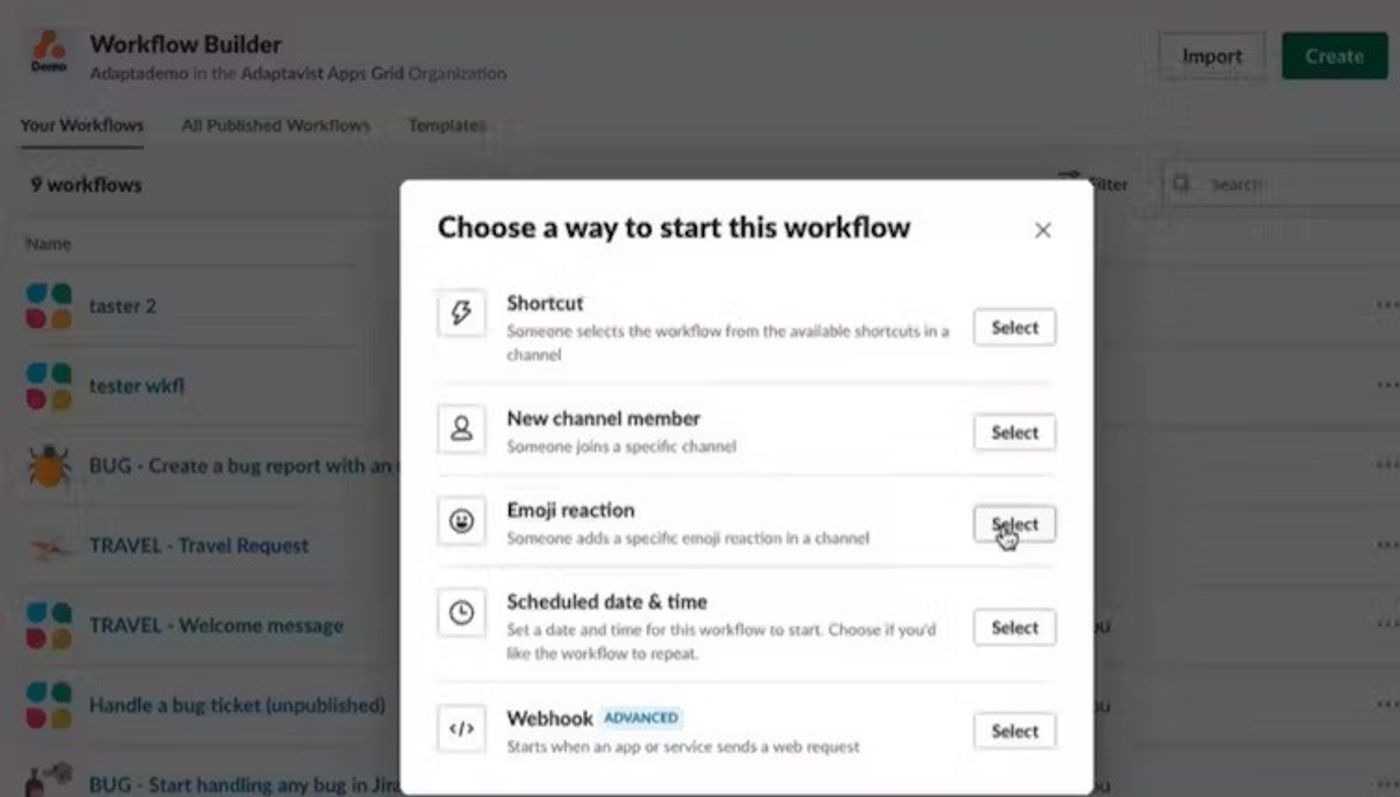
You can use emoji reactions to initiate requests by selecting the option below.
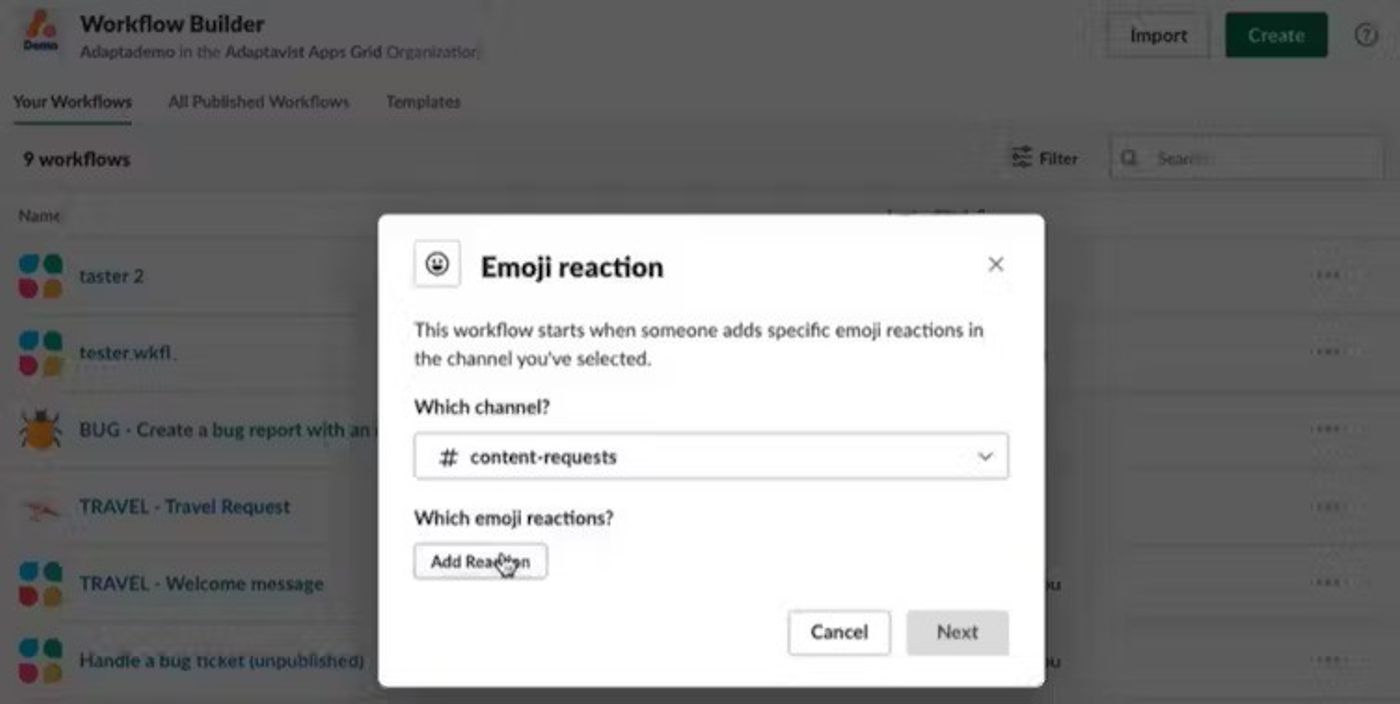
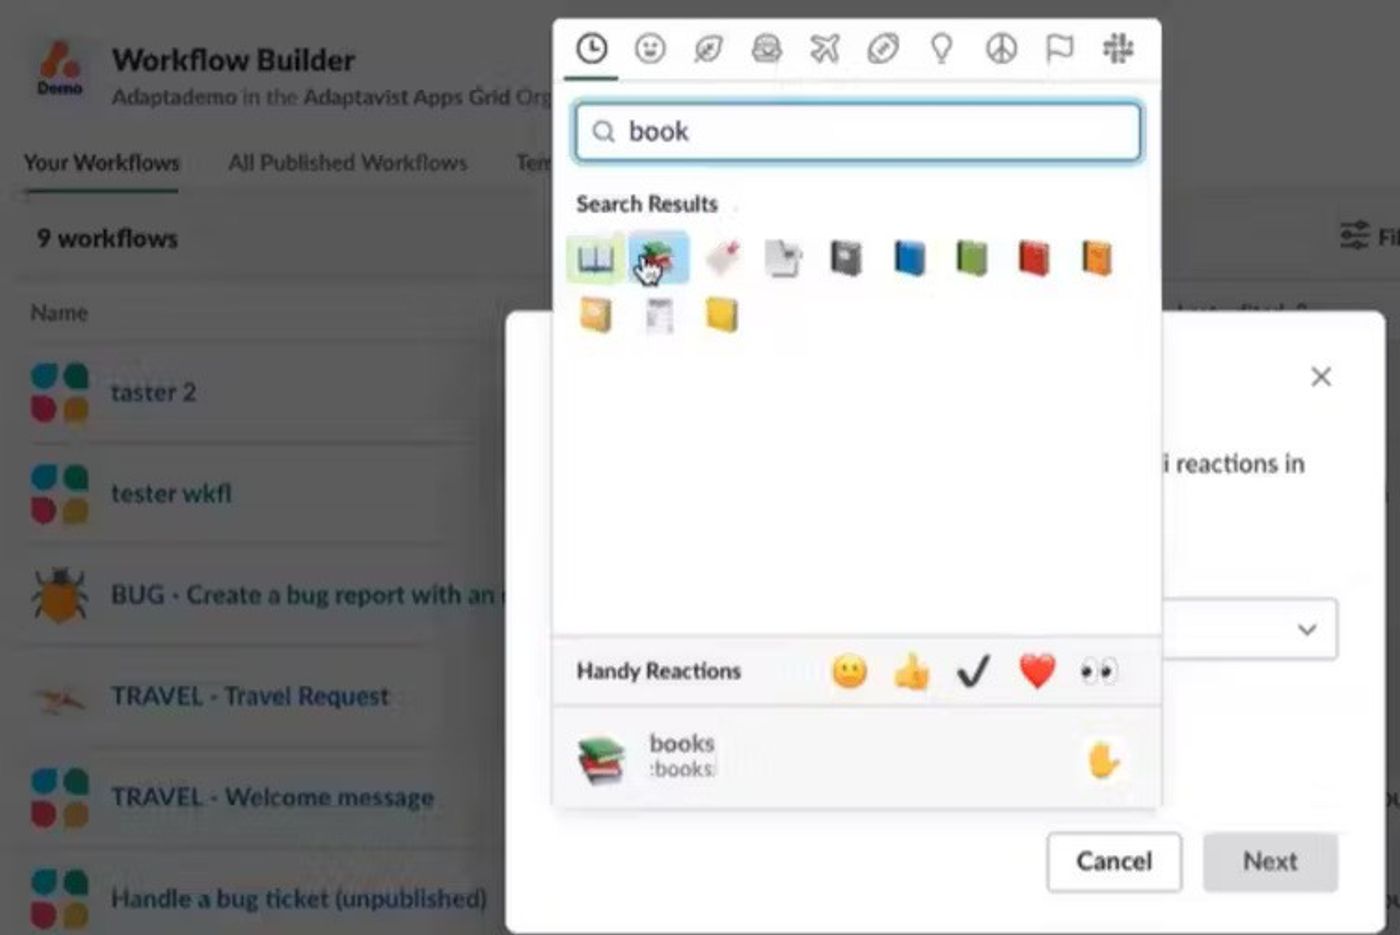
Select the emoji reaction(s) you'd like to add to your workflow as the trigger.
Click next.
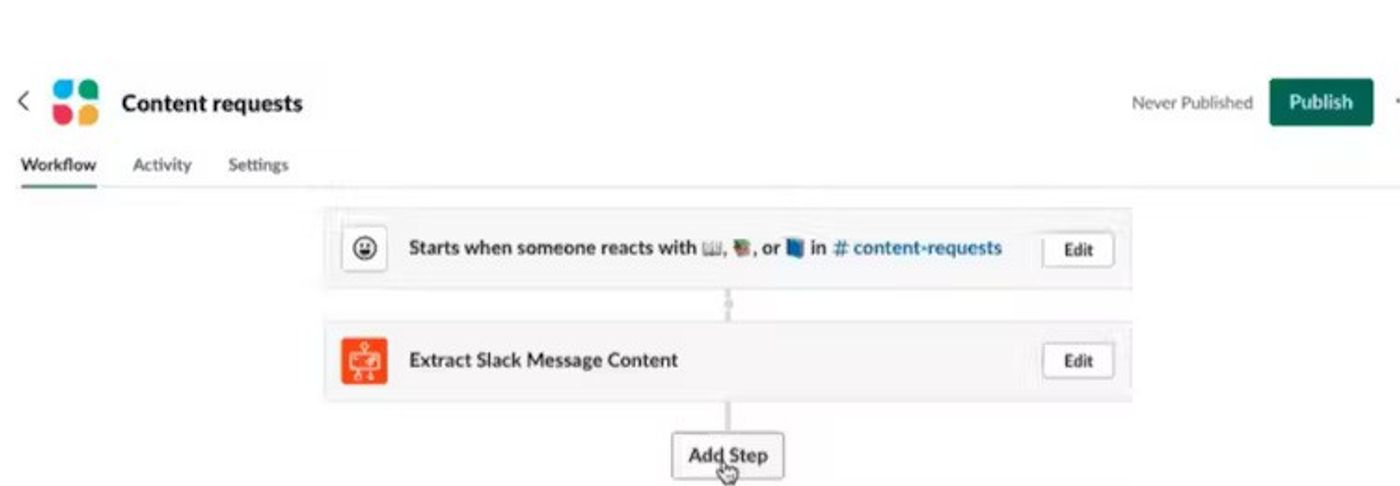
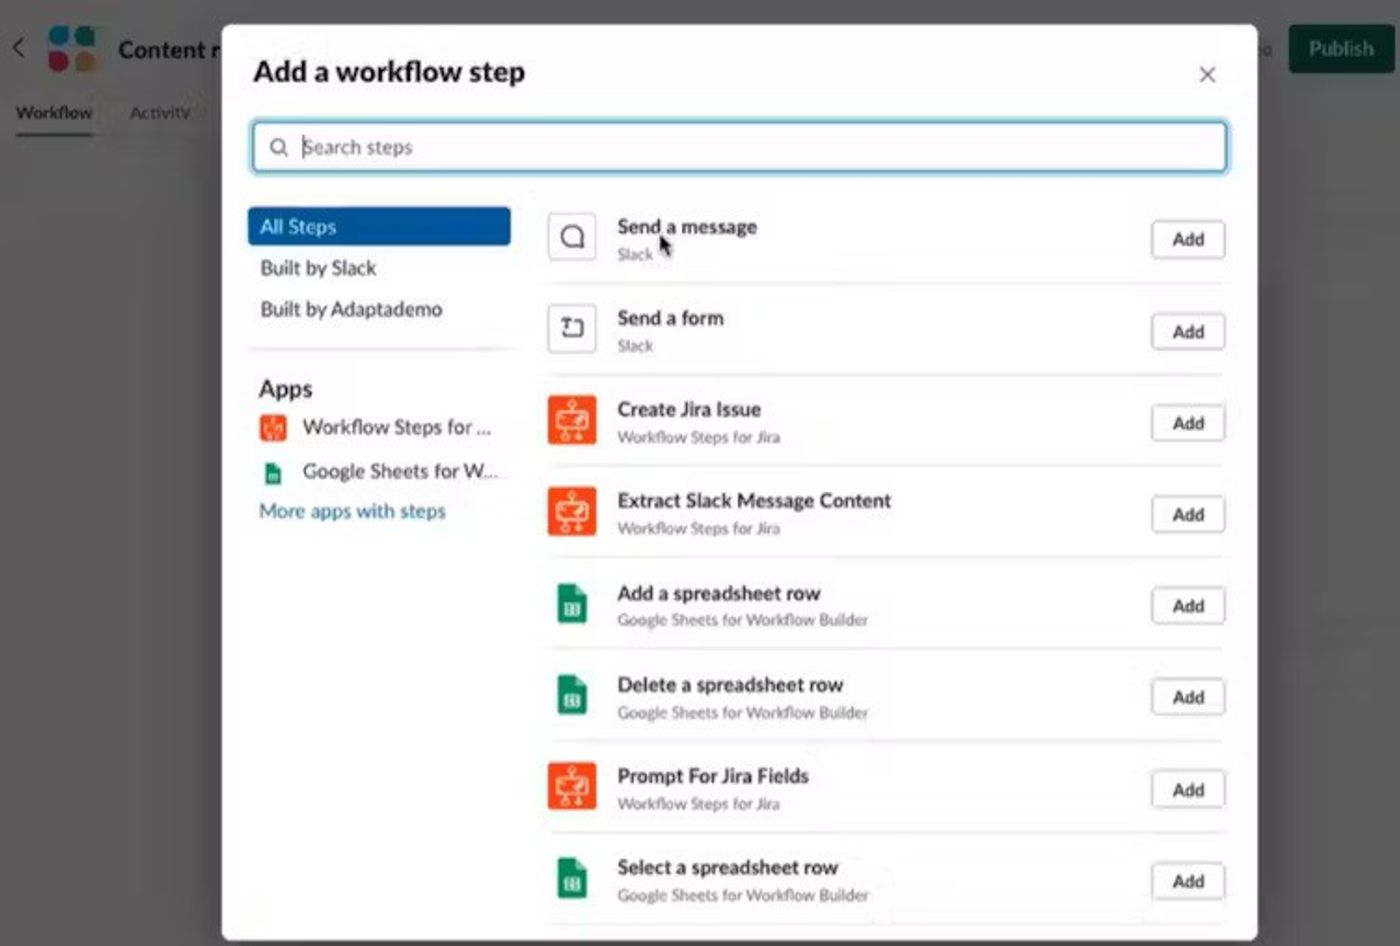
Then click ‘add step’ as below.

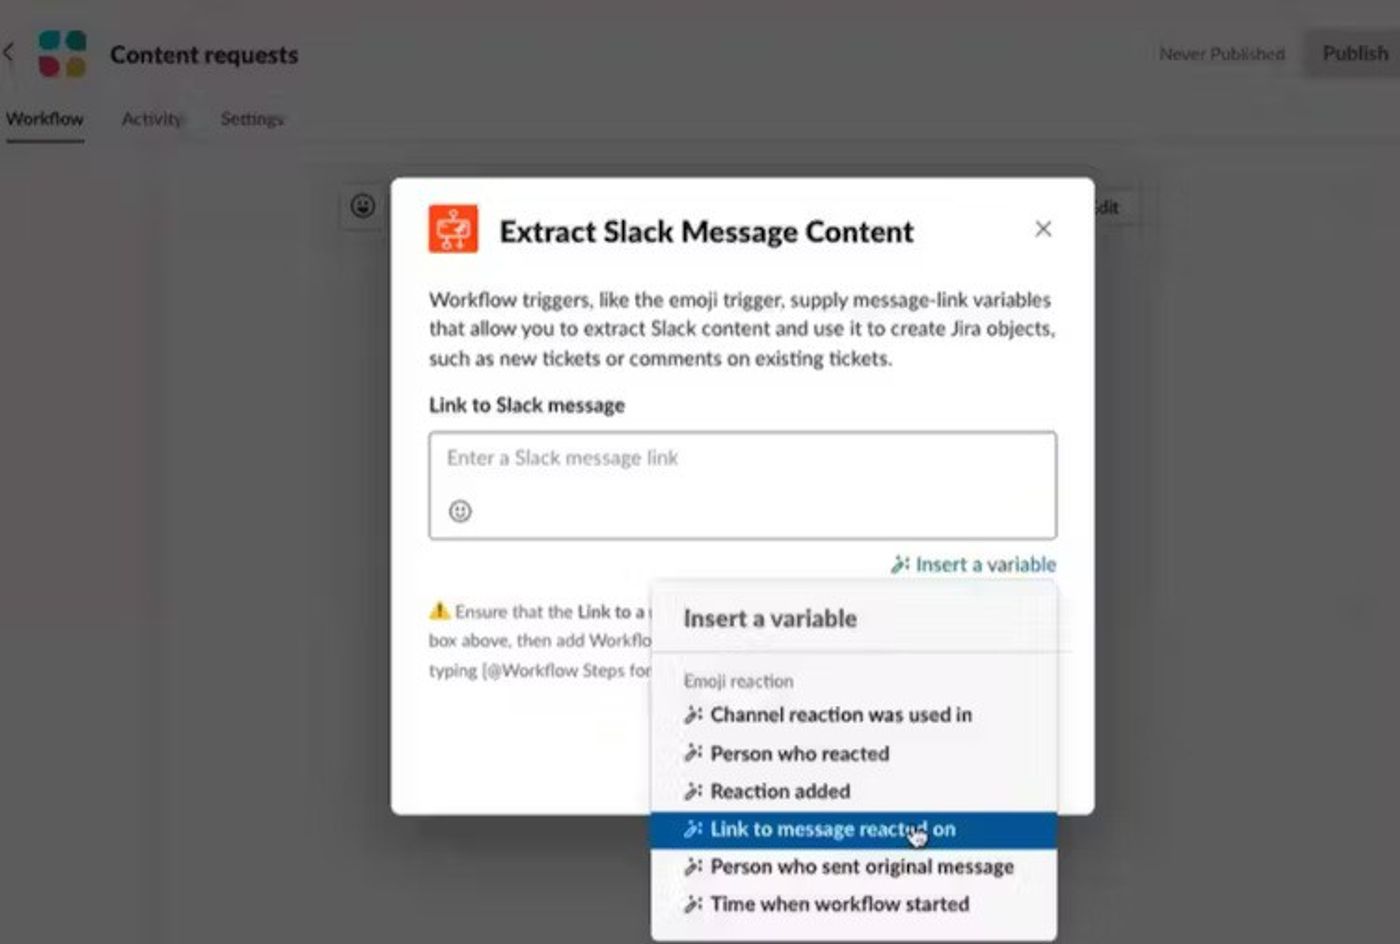
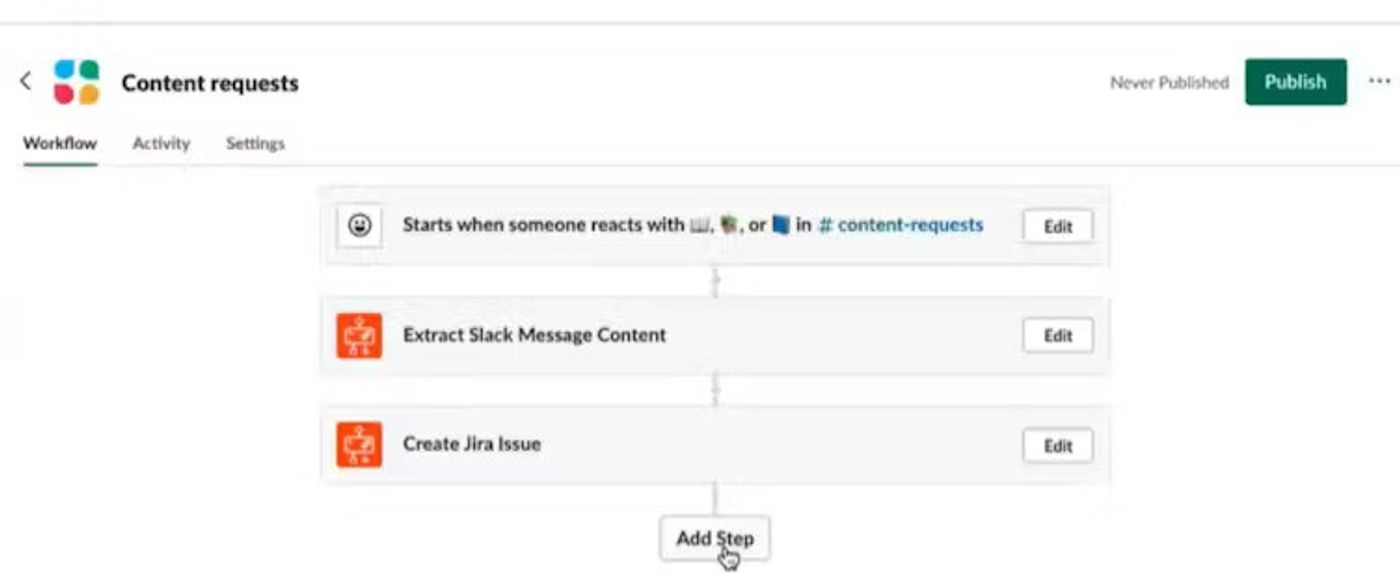
The next step is to add the Extract Slack Message Content step, which will automatically extract the content from the Slack message when users select the appropriate emoji with their content request. See below.
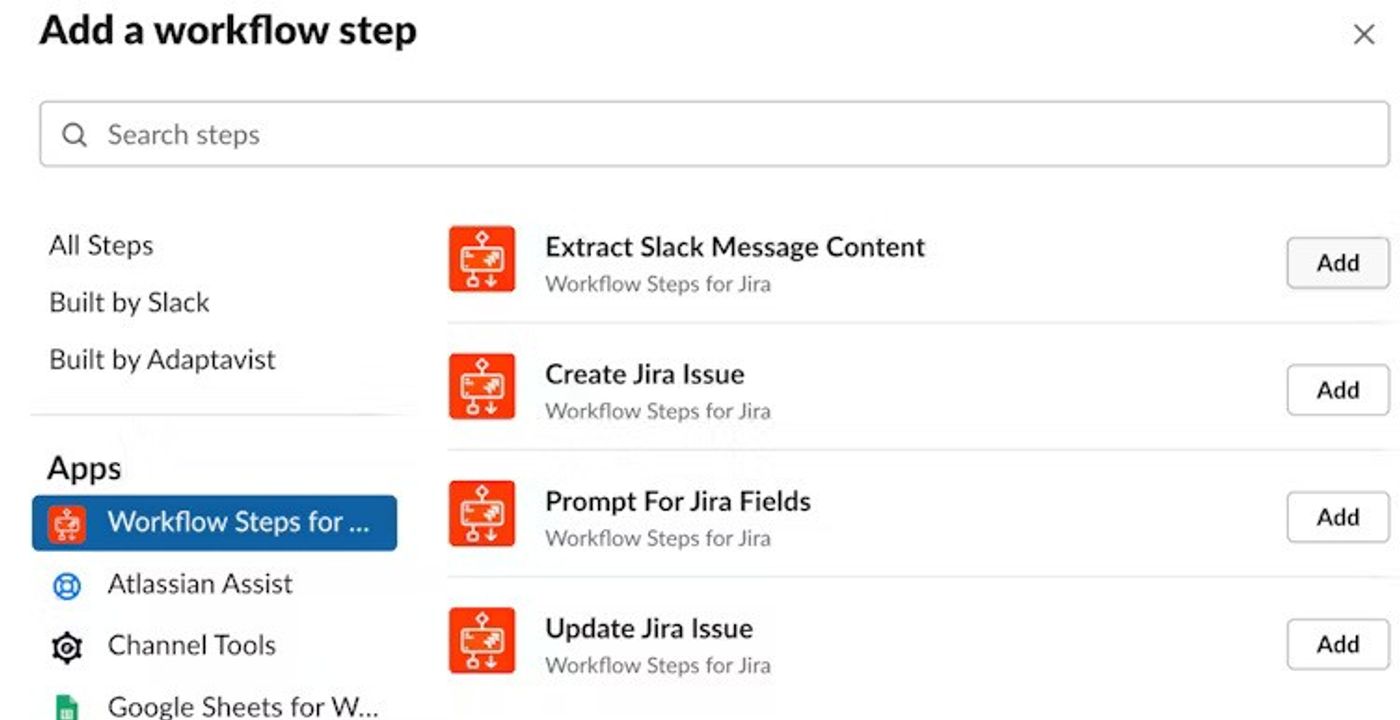
Select save.
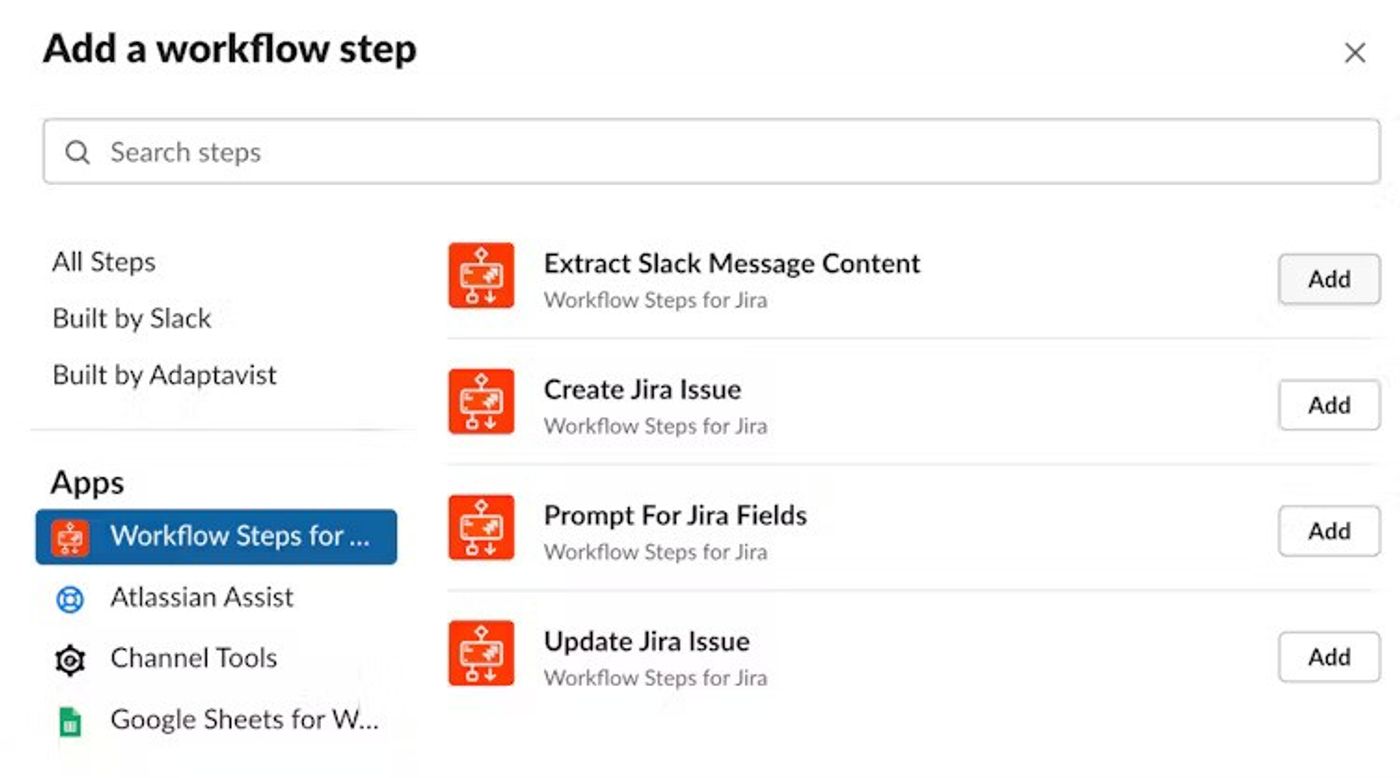
Then click ‘add step’.
Then click ‘add step’.
Next, add the ‘Create Jira issue’ option, which will be triggered automatically when the user adds one of your chosen emojis.
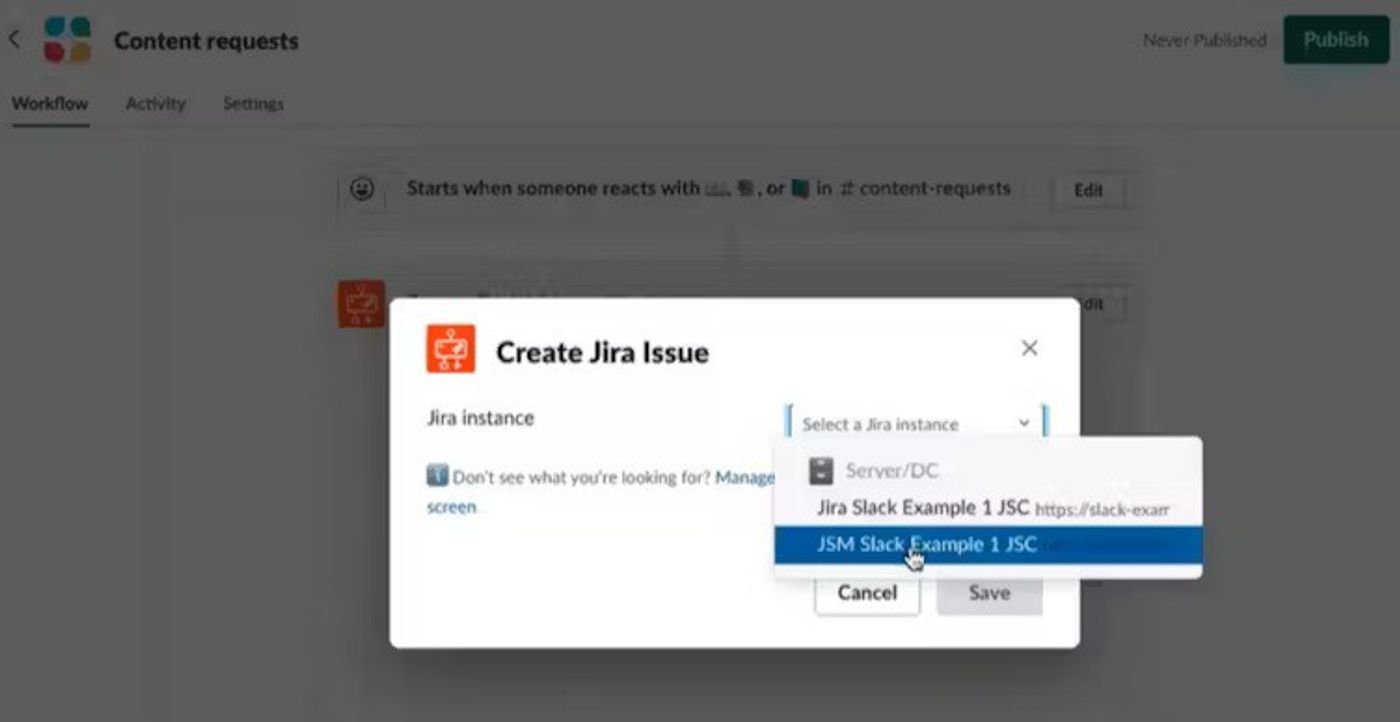
Select the Jira instance you want to connect to the workflow, as below.
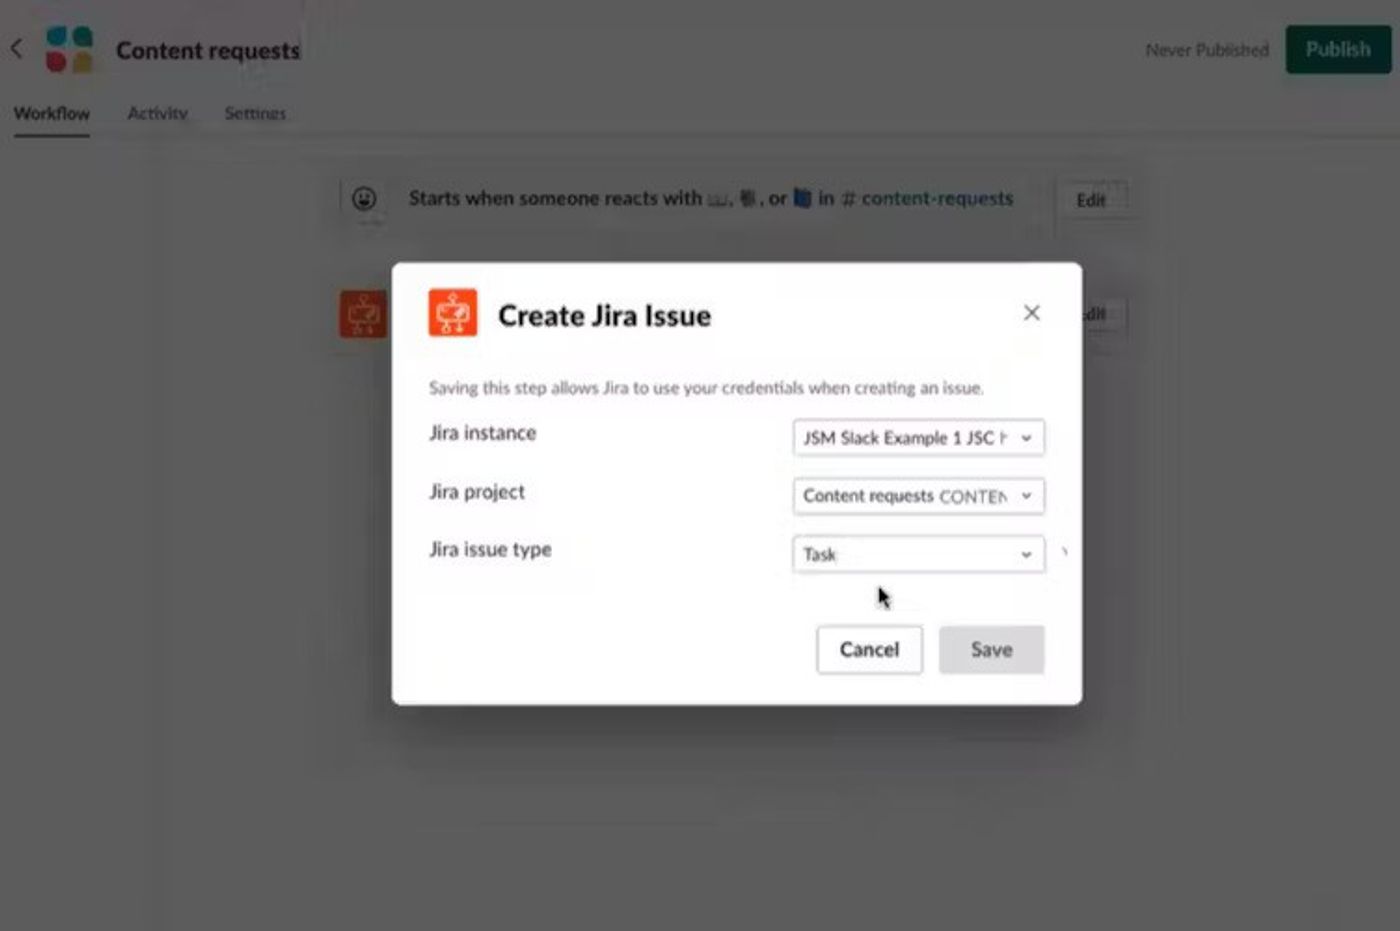
As the next step, add the relevant Jira project and issue type.
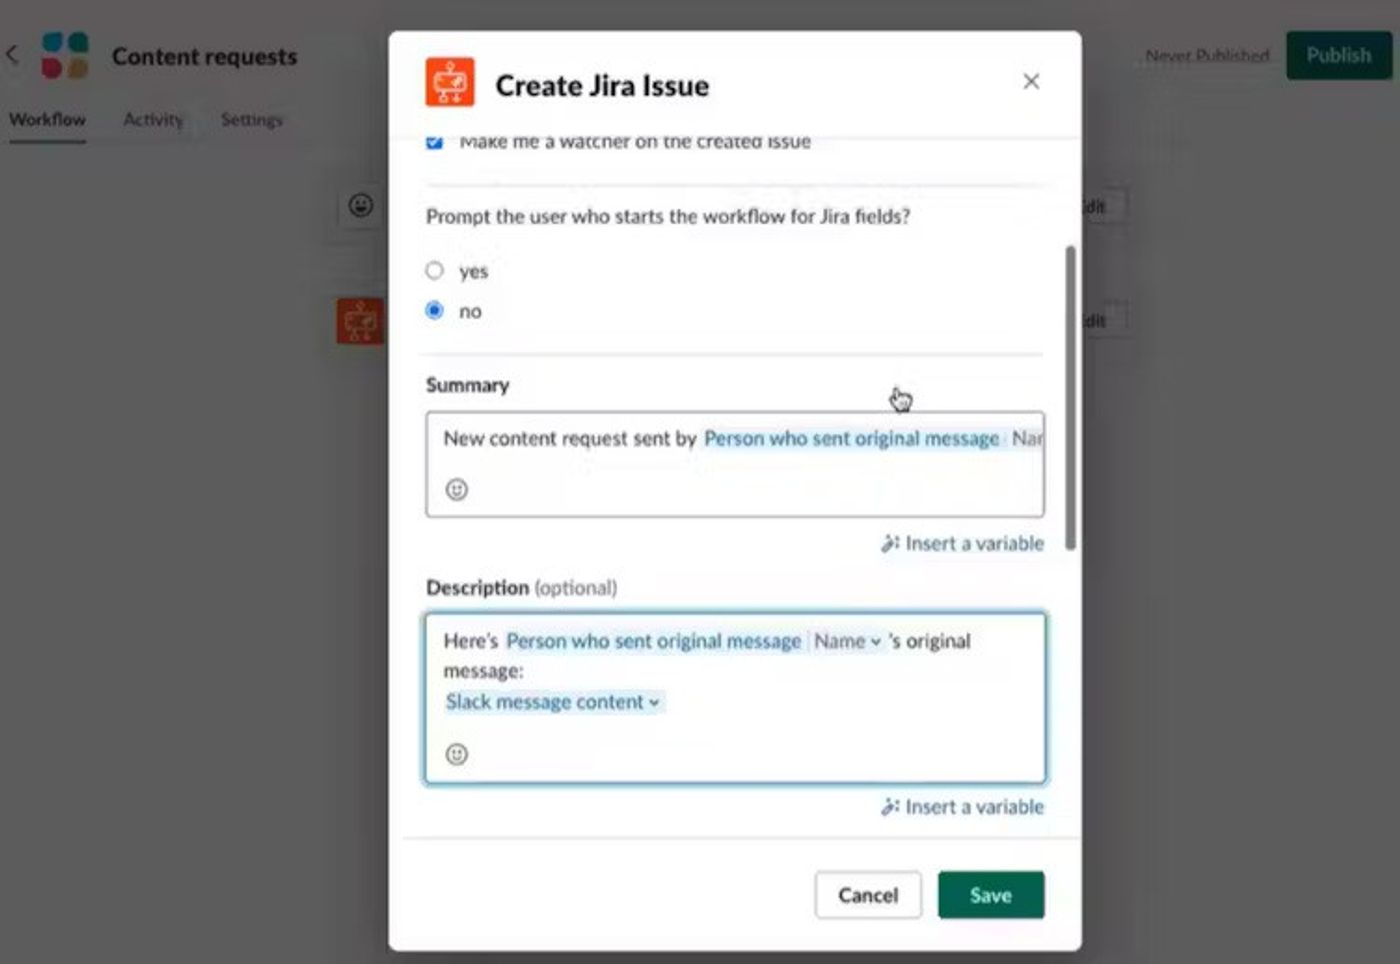
Using the 'insert a variable' drop-down menu, complete the summary box and description, as shown below.
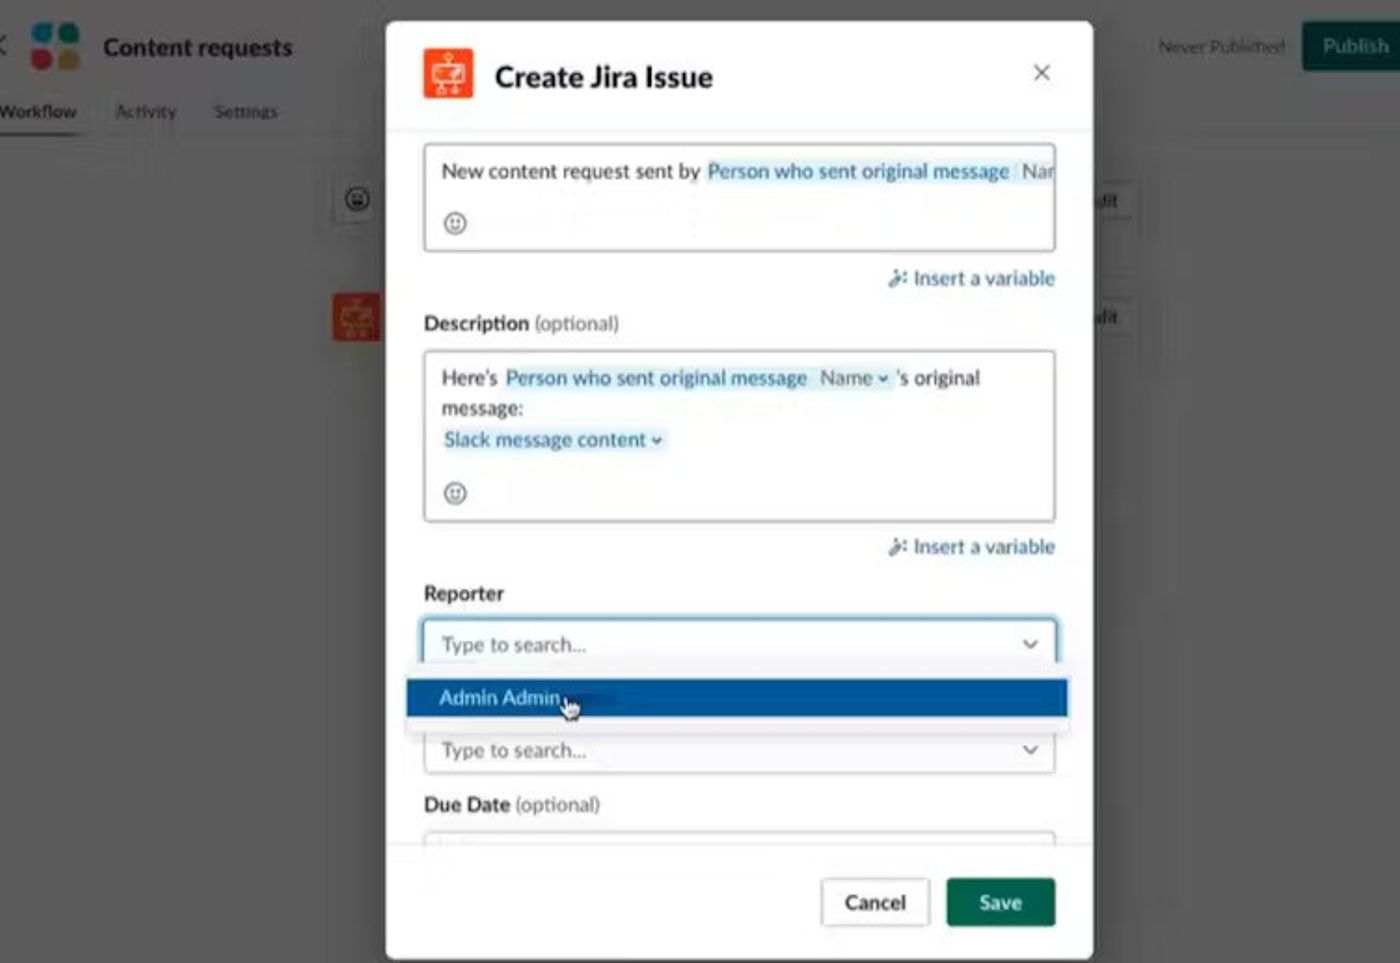
Then select the reporter for the issue; in this case, I selected the admin, but you can set it up to select other options if you wish. Select save.
If you want your Slack users to get a confirmation that the Slack workflow was executed all the way through, you will need to add another step.
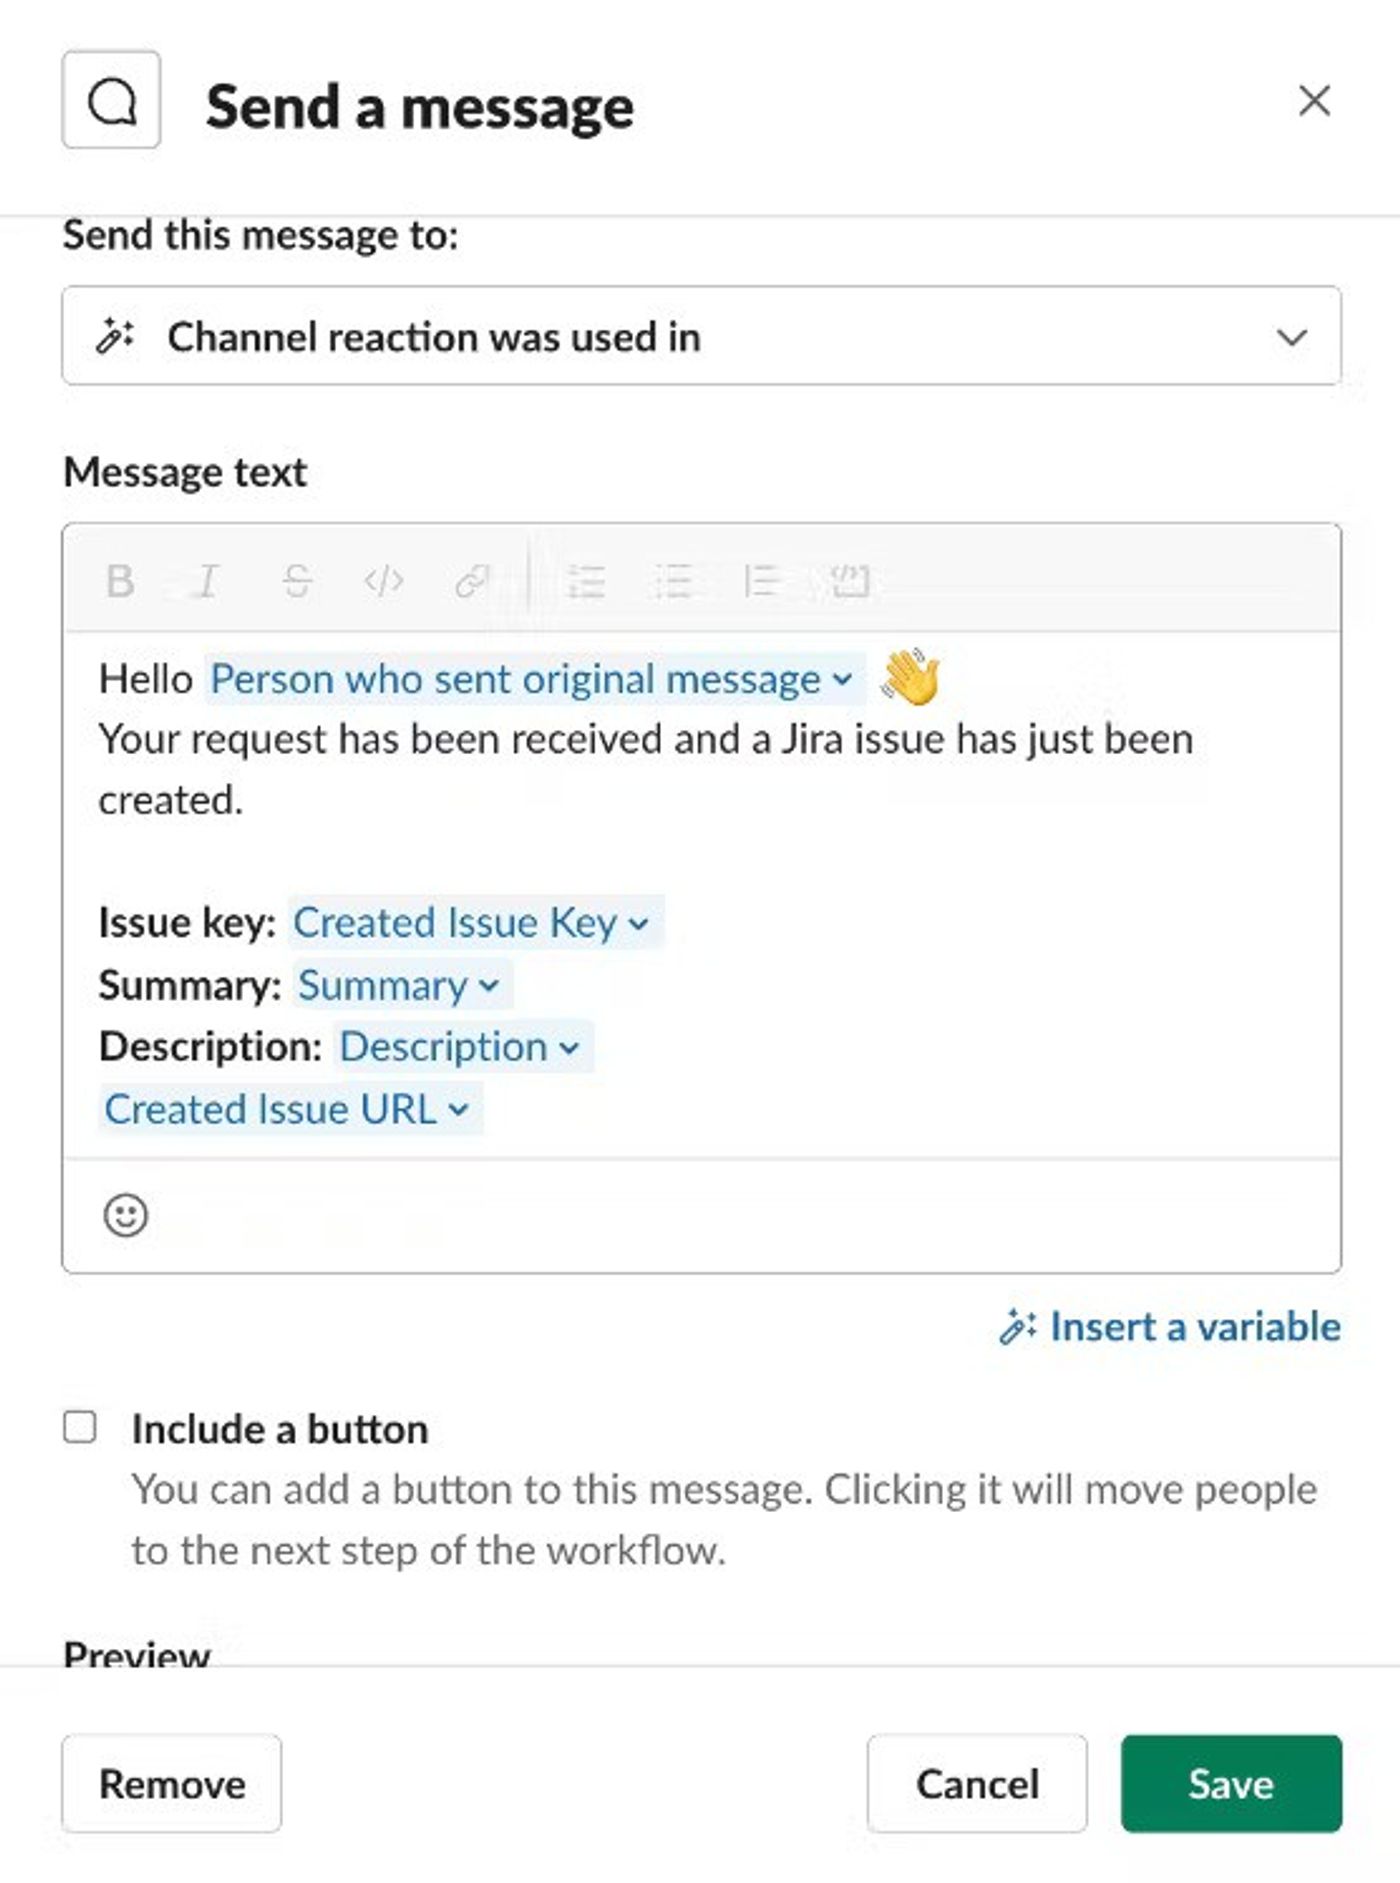
Click, send a message.
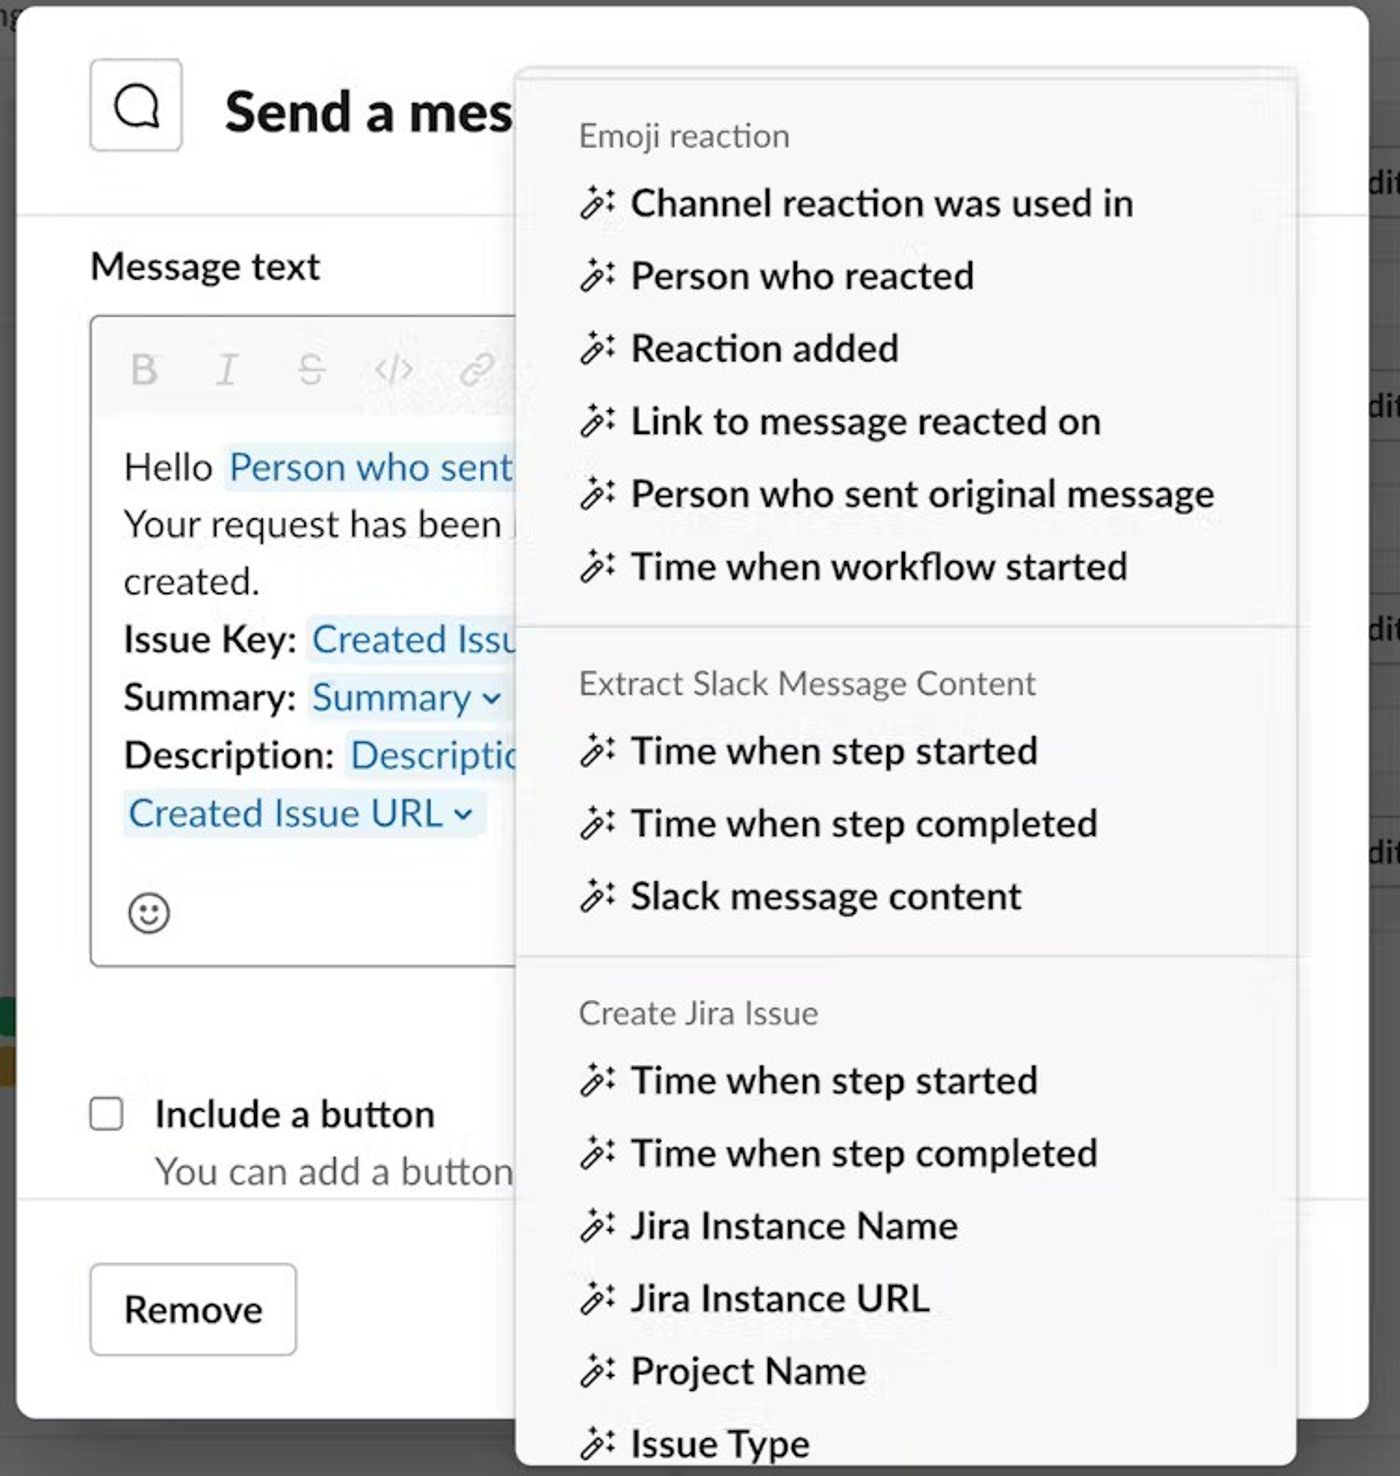
If you would like to add details from previous steps to the content message, you can use the ‘Insert a variable’ drop-down menu, as shown below.
You can preview the message on the preview screen and then select save.
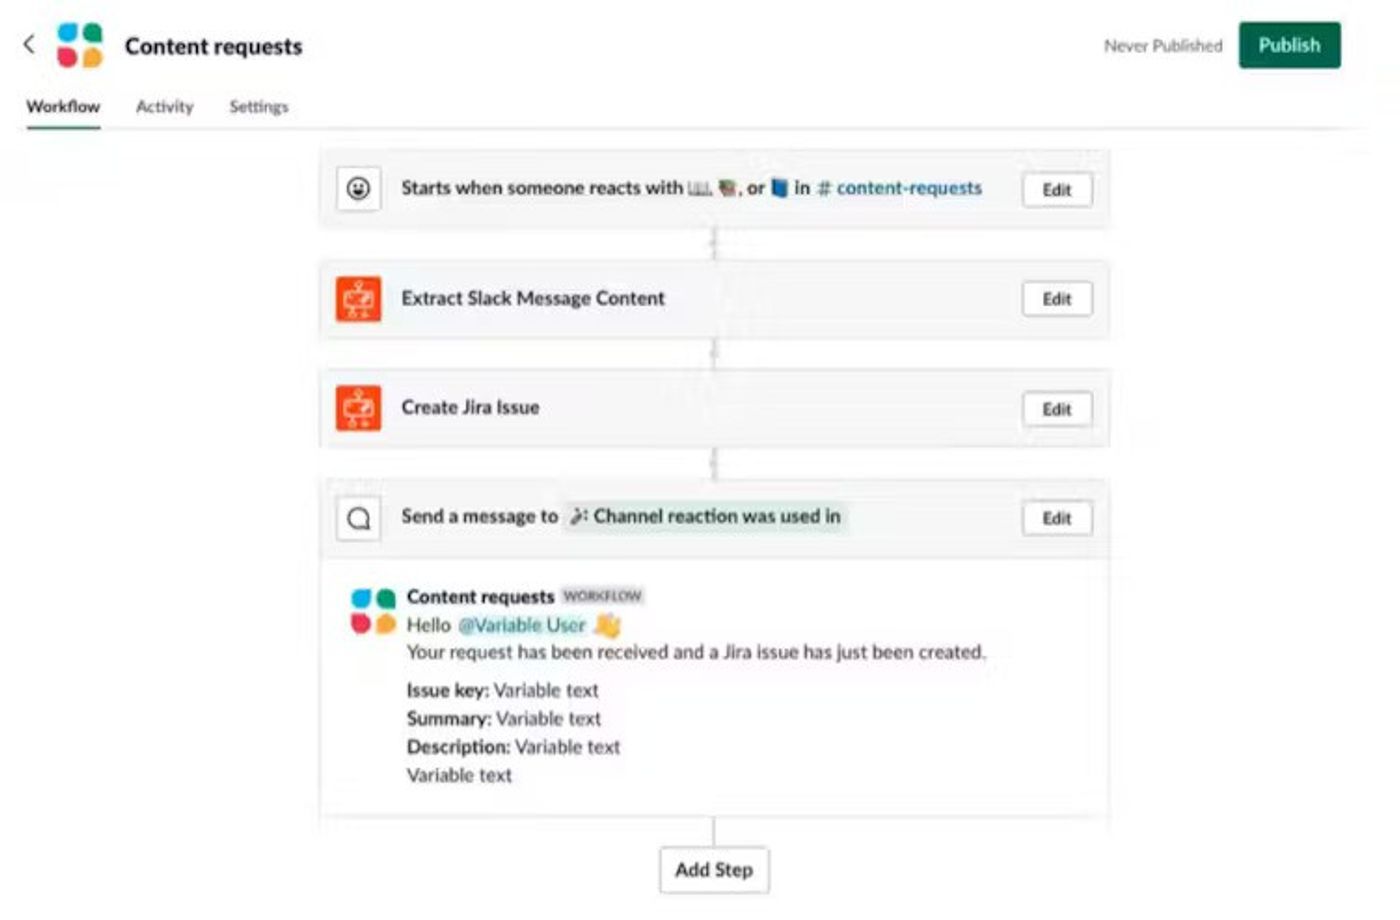
As a result, your workflow should look like this:
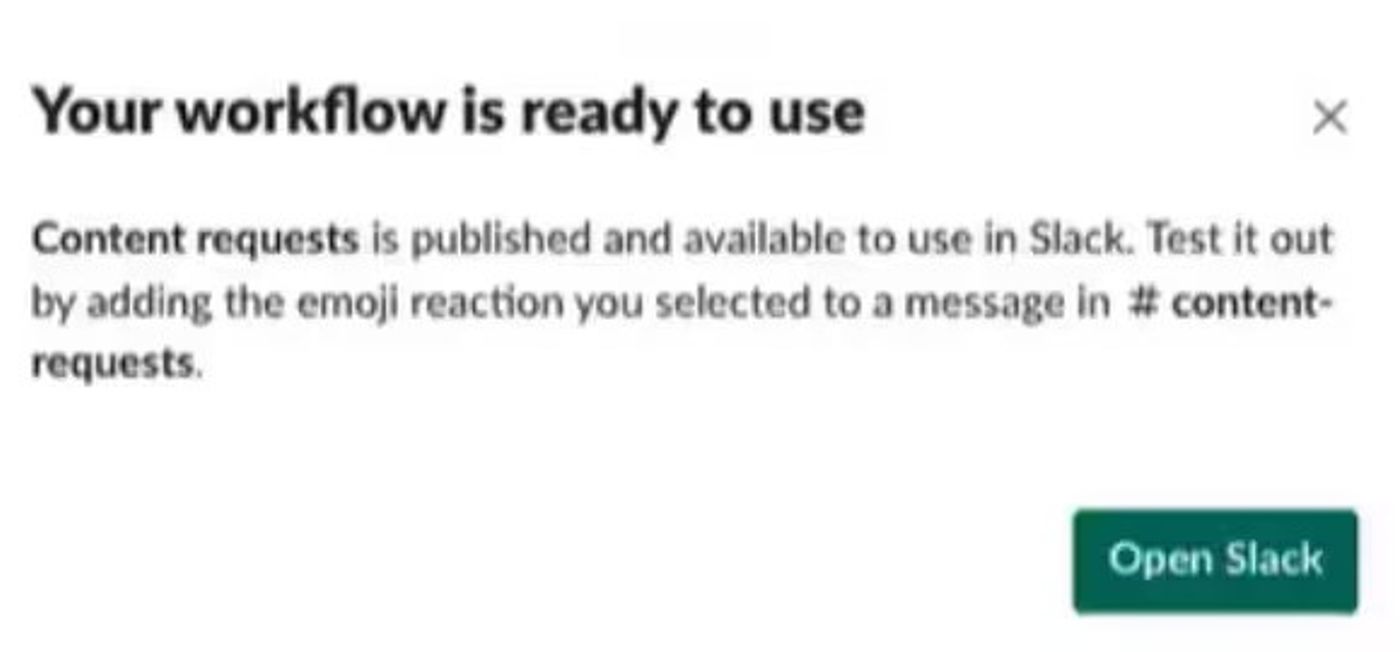
The notification below should appear once you click publish (top right corner).
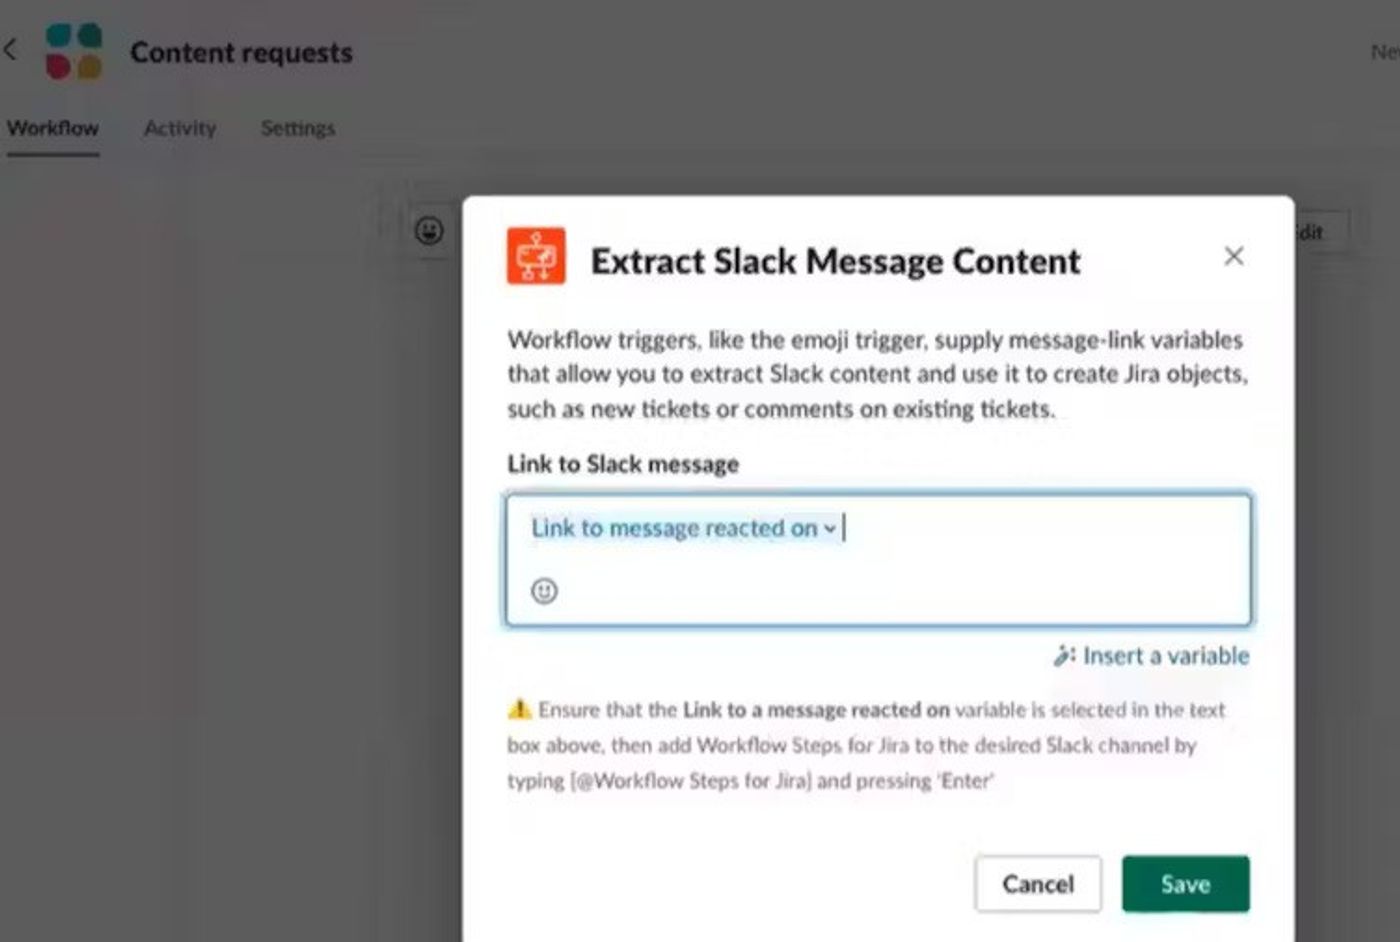
Before using your workflow, you must follow the instructions in the Extract Slack Message Content step.
Ensure that the Link to a message reacted on variable is selected in the text box above, then add Workflow Steps for Jira to the desired Slack channel by typing @Workflow Steps for Jira and pressing 'Enter'.
Ensure that the Link to a message reacted on variable is selected in the text box above, then add Workflow Steps for Jira to the desired Slack channel by typing @Workflow Steps for Jira and pressing 'Enter'.
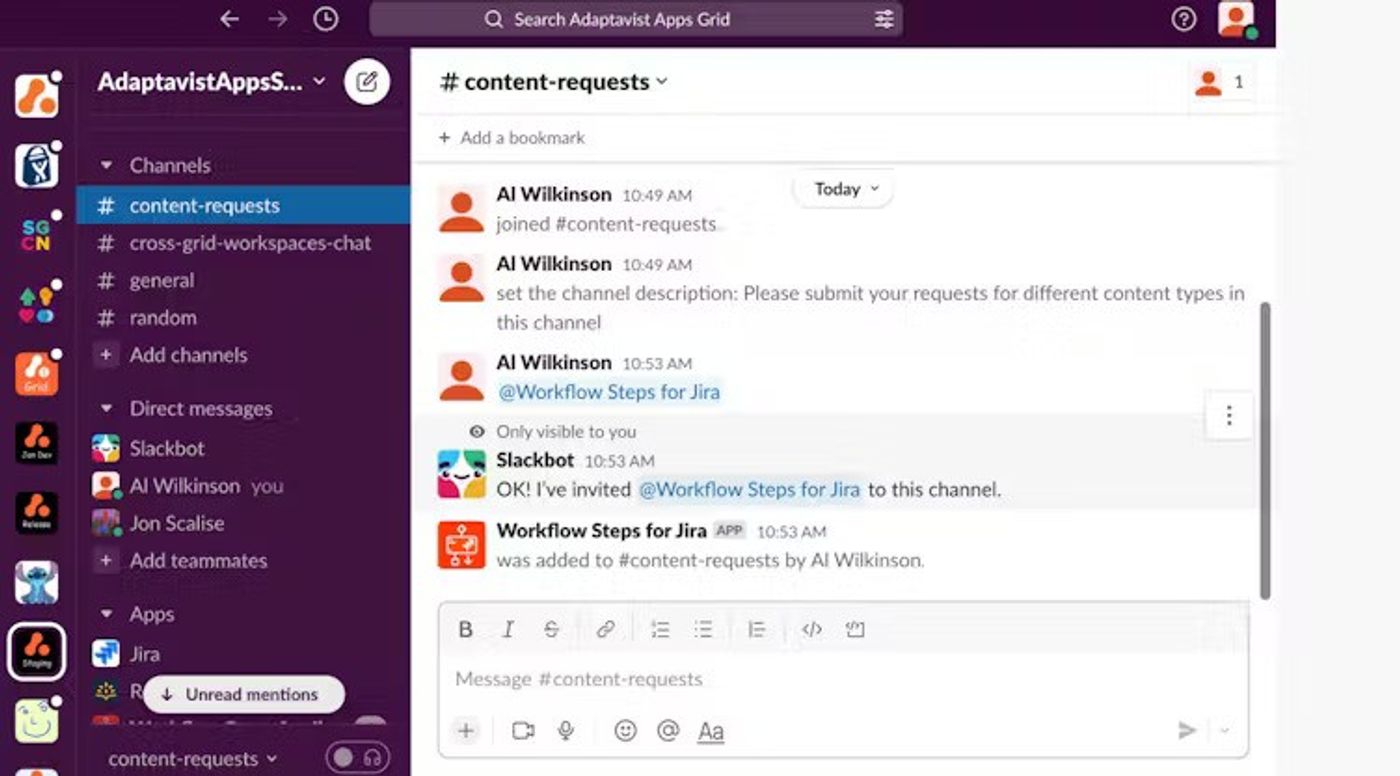
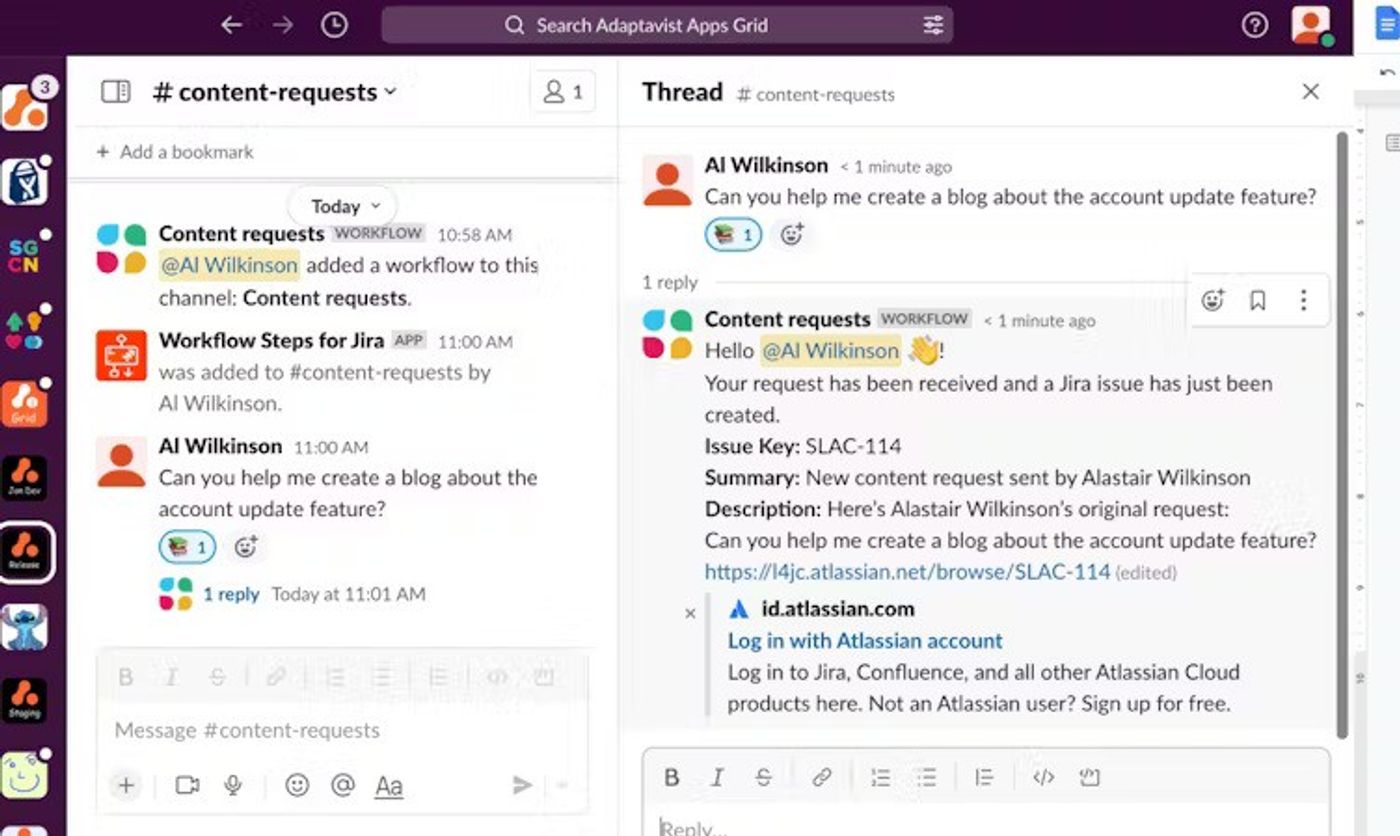
Now for the exciting part. When a user posts a request in the channel, and you respond with an emoji (I used a book emoji above), the Jira ticket details will appear as if by magic.
Take your content production to the next level
As a content marketer, you have a lot of spinning plates to manage. While Workflow Steps for Jira won't solve all your challenges, it will give you greater control over your day-to-day processes, so you can focus on creating engaging content that drives new opportunities for your business.
Want to get started quickly?
One of the many great things about the app is that anyone in your organisation can use it to save time and boost efficiency. Tapping into our ready-made templates is a great way to help your colleagues get started.
Download the template for the exact workflow we've been discussing in this post, and start capturing content requests directly from Slack! Remember, you'll need to edit the template before running, so it has your Jira instance details in the configuration.
Download the template for the exact workflow we've been discussing in this post, and start capturing content requests directly from Slack! Remember, you'll need to edit the template before running, so it has your Jira instance details in the configuration.
We'd love to hear what you think
If you are keen to try out Workflow Steps for Jira for a specific use case but not sure how to go about it, feel free to reach out to us for a chat. We're always on the lookout for creative ways to help make work smoother and groovier for you and your teams!
Not tried the app yet? Start you free trial today!
Not tried the app yet? Start you free trial today!
Written by
Charlie Courtney
Senior Content Marketing Manager
Charlie is the Senior Content Marketing Manager at Upscale, and has worked in B2B/B2C marketing for nearly a decade. Charlie is responsible for crafting integrated content marketing campaigns that elevate our products, champion our brand, and create memorable experiences for our customers.
Jira
Slack